

Create your first project and ticket
A hands-on walkthrough - create a project, add a ticket, and move it across the board, with every field explained.
This page is the fastest way to get a feel for orboto: create a project, add a ticket to it, and move that ticket across the board - with every field along the way explained, not just clicked through. Fifteen minutes, start to finish.
You need to be signed in already - see Getting started if you have not signed in yet.
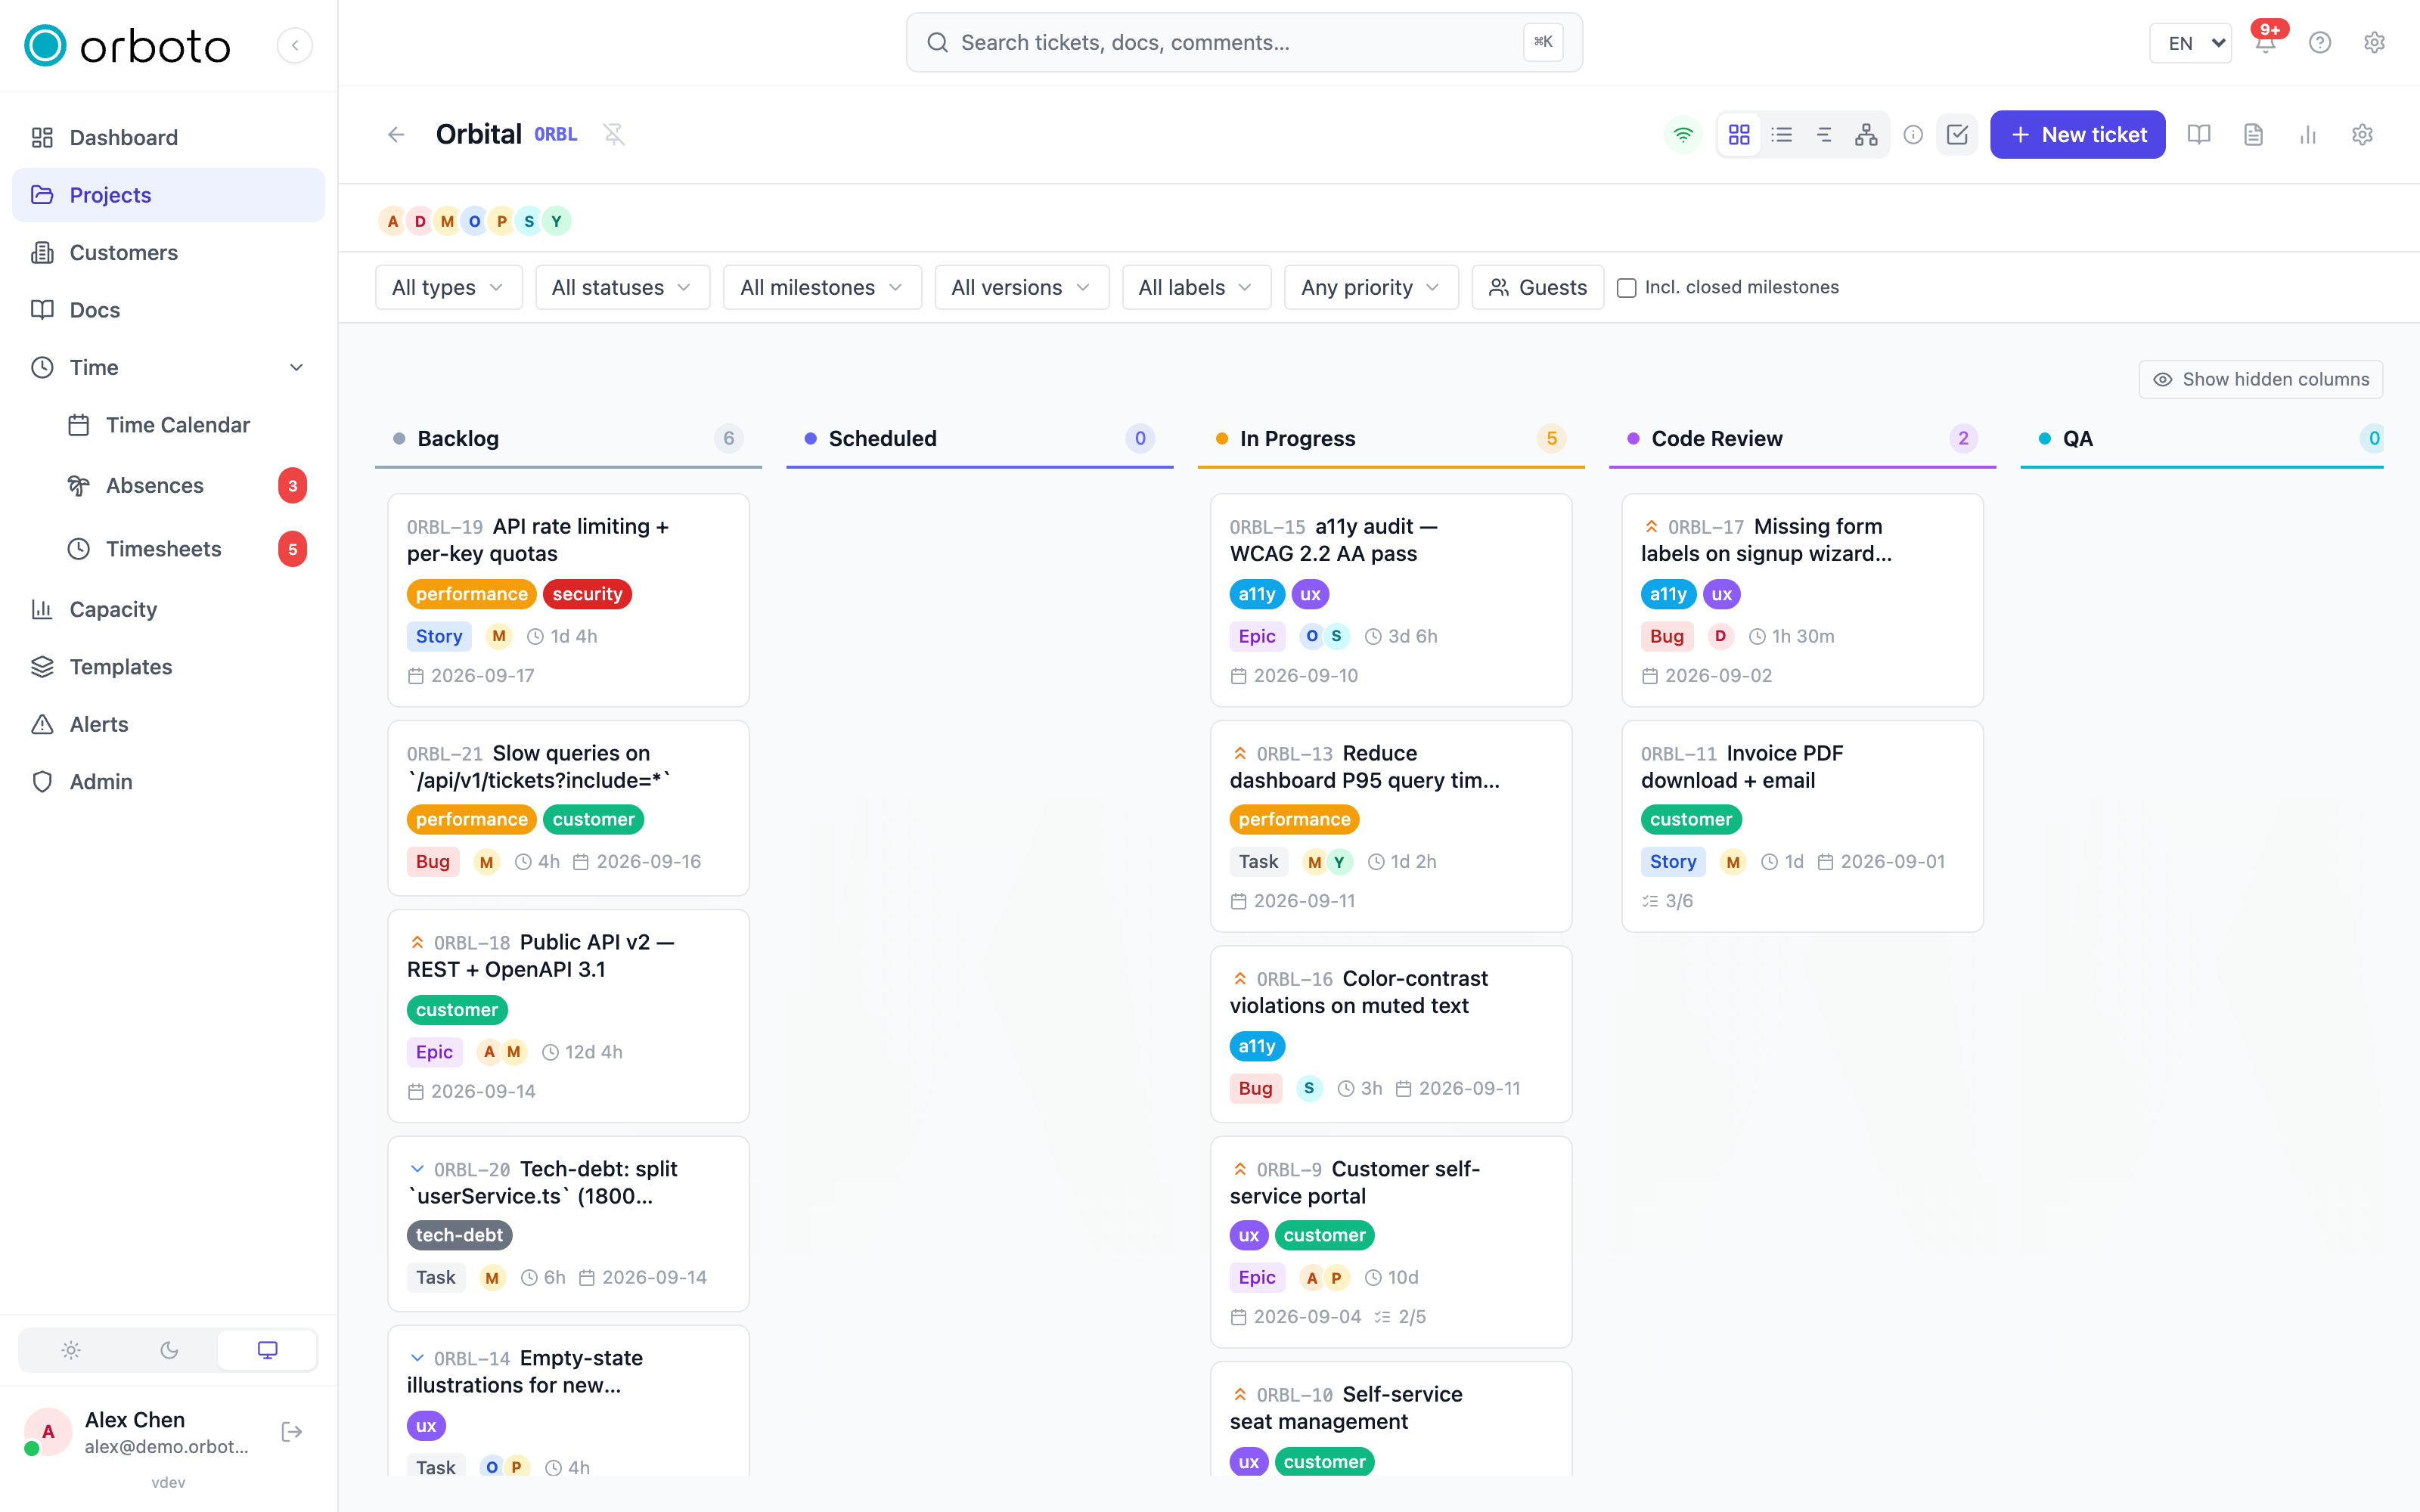
1. Create a project
A project is the container everything else lives in: tickets, milestones, docs spaces, and members all belong to exactly one project (unless a workspace-wide feature explicitly says otherwise).
- Select Projects in the sidebar.
- Select New project.
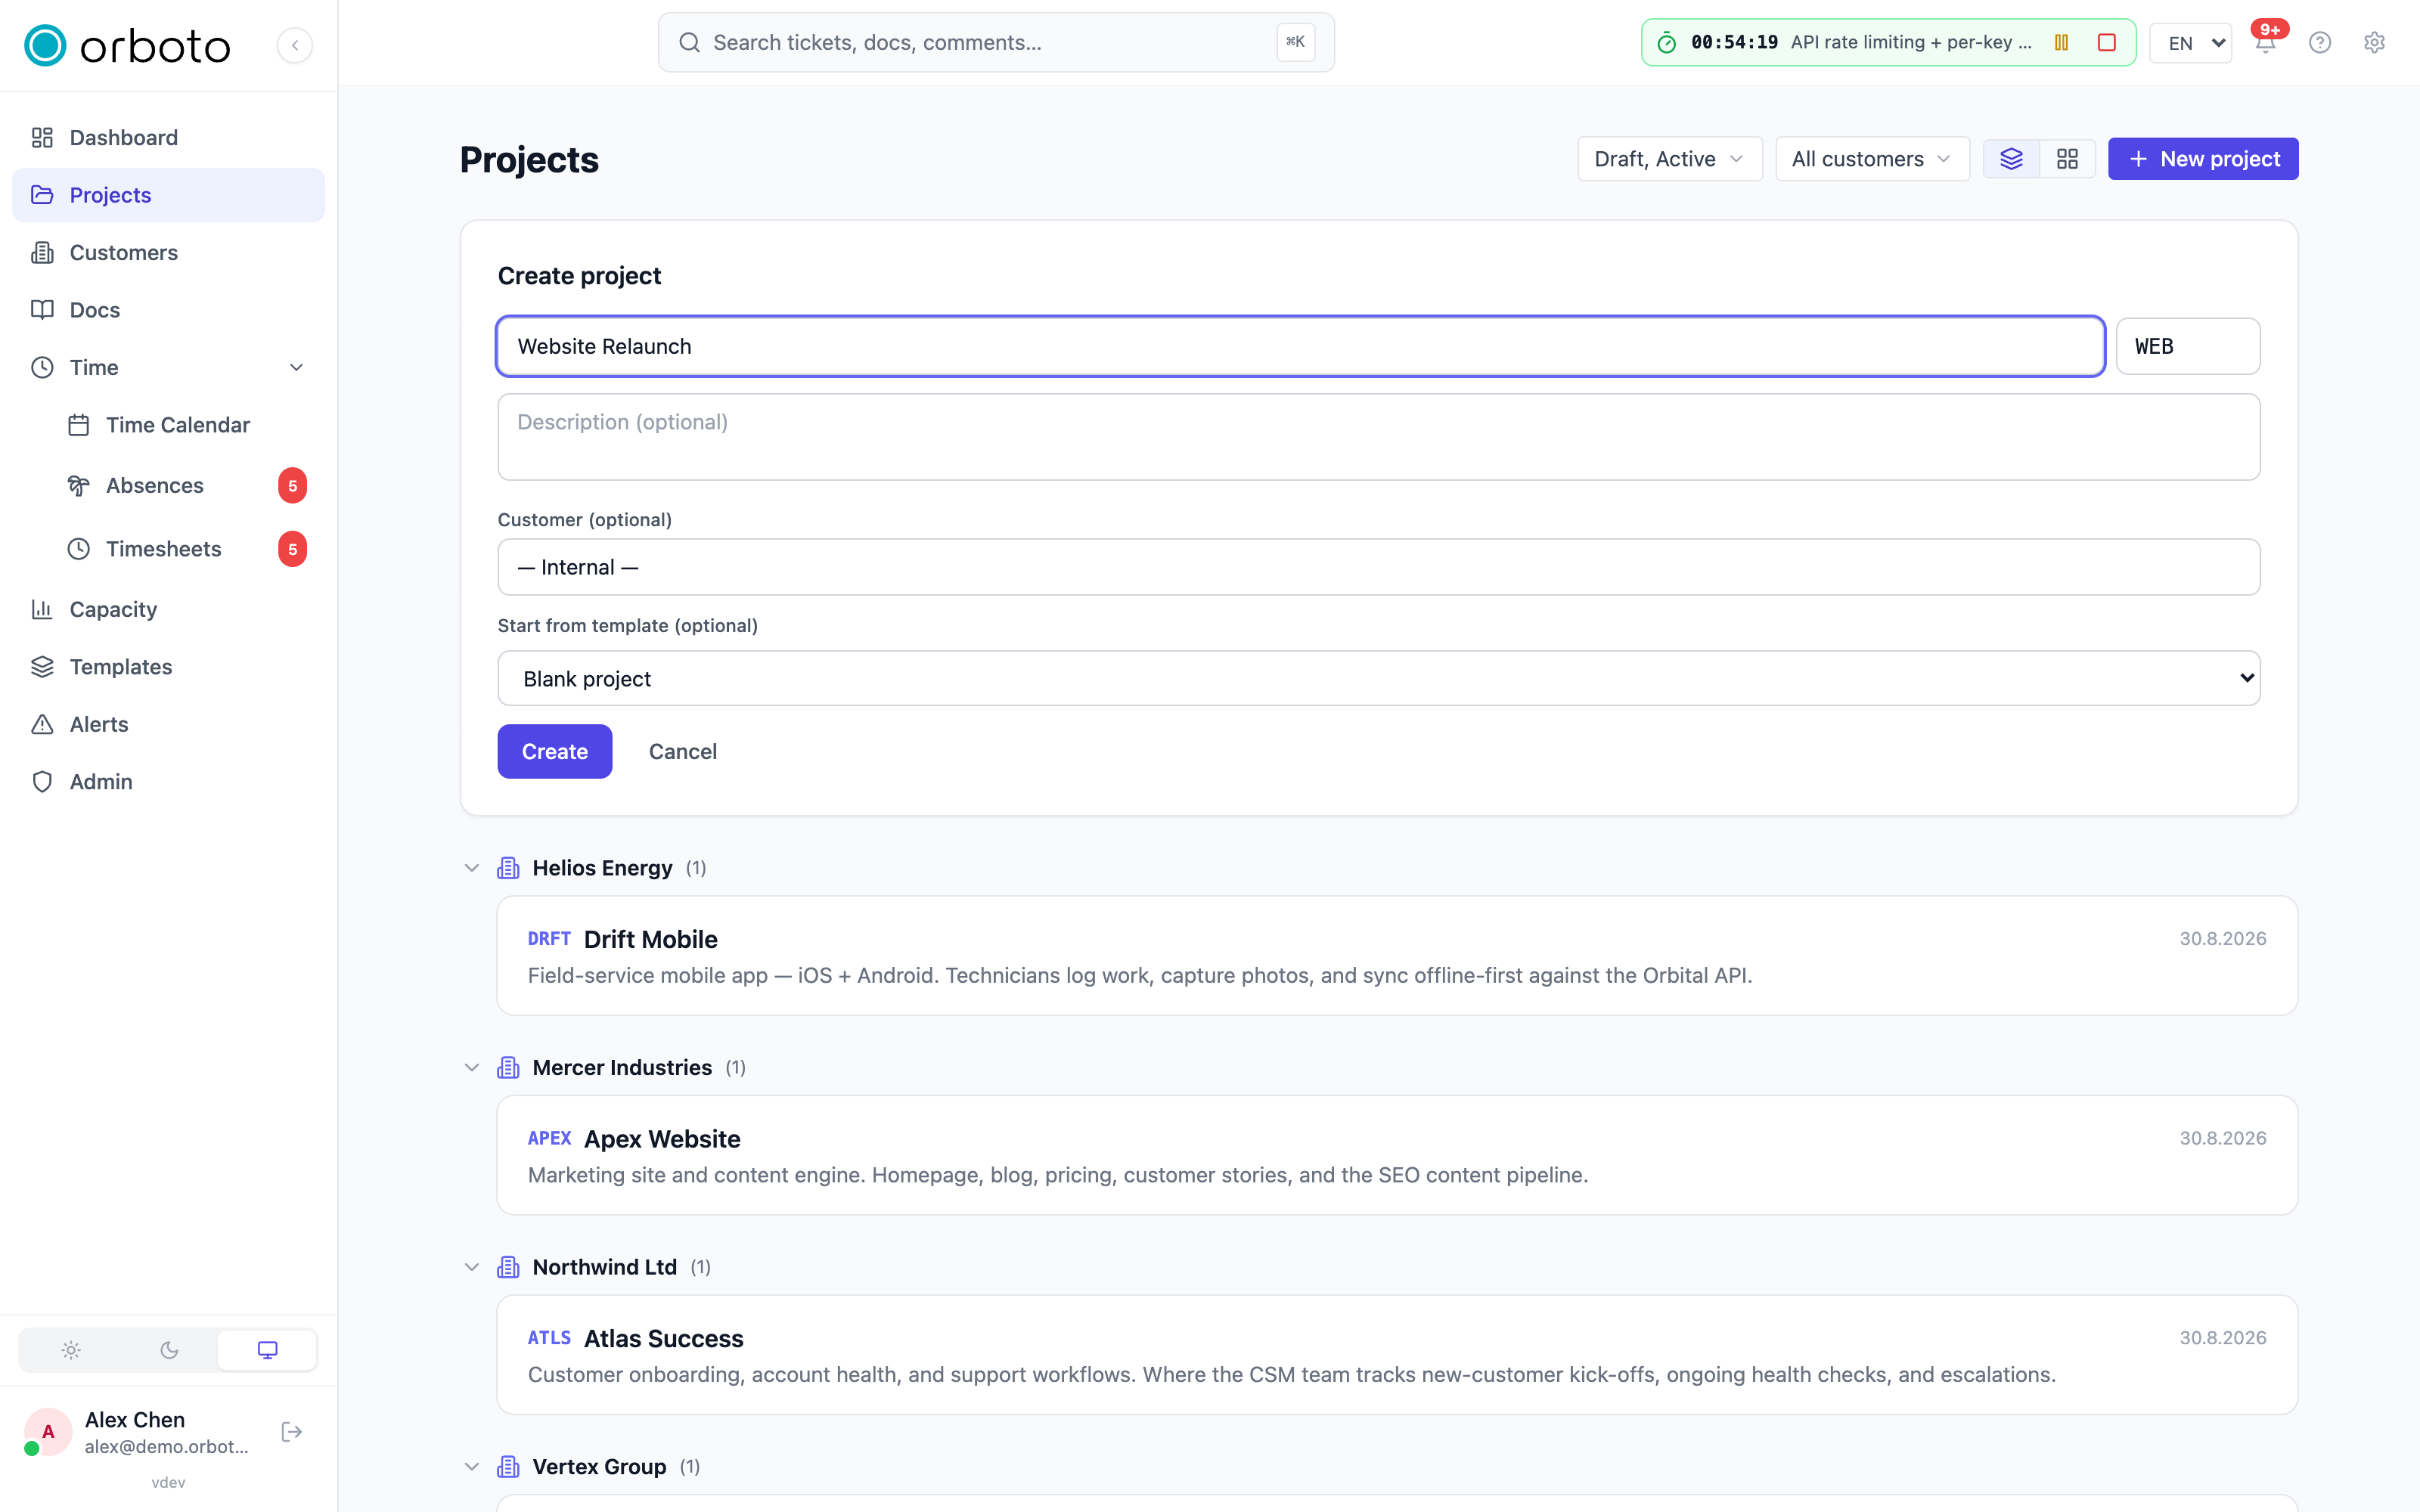
- Fill in the form:
- Name - the full, human-readable name (for example "Website Relaunch"). This is what shows everywhere in menus and titles.
- Key - a short project code, 2 to 10 letters or digits (for example
WEB). Every ticket you create afterwards is numbered under this key (WEB-1,WEB-2, ...), so pick something short and permanent - you can rename the project later, but changing its key is disruptive because it re-numbers every reference to every ticket. Lowercase is fine to type; it is stored as uppercase automatically. If the key you type is already used by another project in your workspace, the form tells you before you can save. - Description (optional) - shown on the project card and its overview; use it to say what the project is for.
- Customer (optional) - link the project to a customer record if your workspace tracks external customers. This is what makes the project eligible for guest access later.
- Select Save.
You land on the new project, currently empty, showing the Kanban board. You can refine members, statuses, and labels later in its settings - see Project settings. None of that is required to start working; a freshly created project is automatically seeded with a usable set of default statuses (To Do, In Progress, In Review, Done), so the board works immediately.
Don't see New project? Project creation is a permission your workspace administrator grants, separately from being able to work inside projects you're already a member of. Ask them to either grant it to you or create the first project and add you as a member - everything below still applies once you have a project open, whoever created it.
2. Create a ticket
A ticket is one unit of work, always living inside exactly one project.
- In your new project, select New ticket.
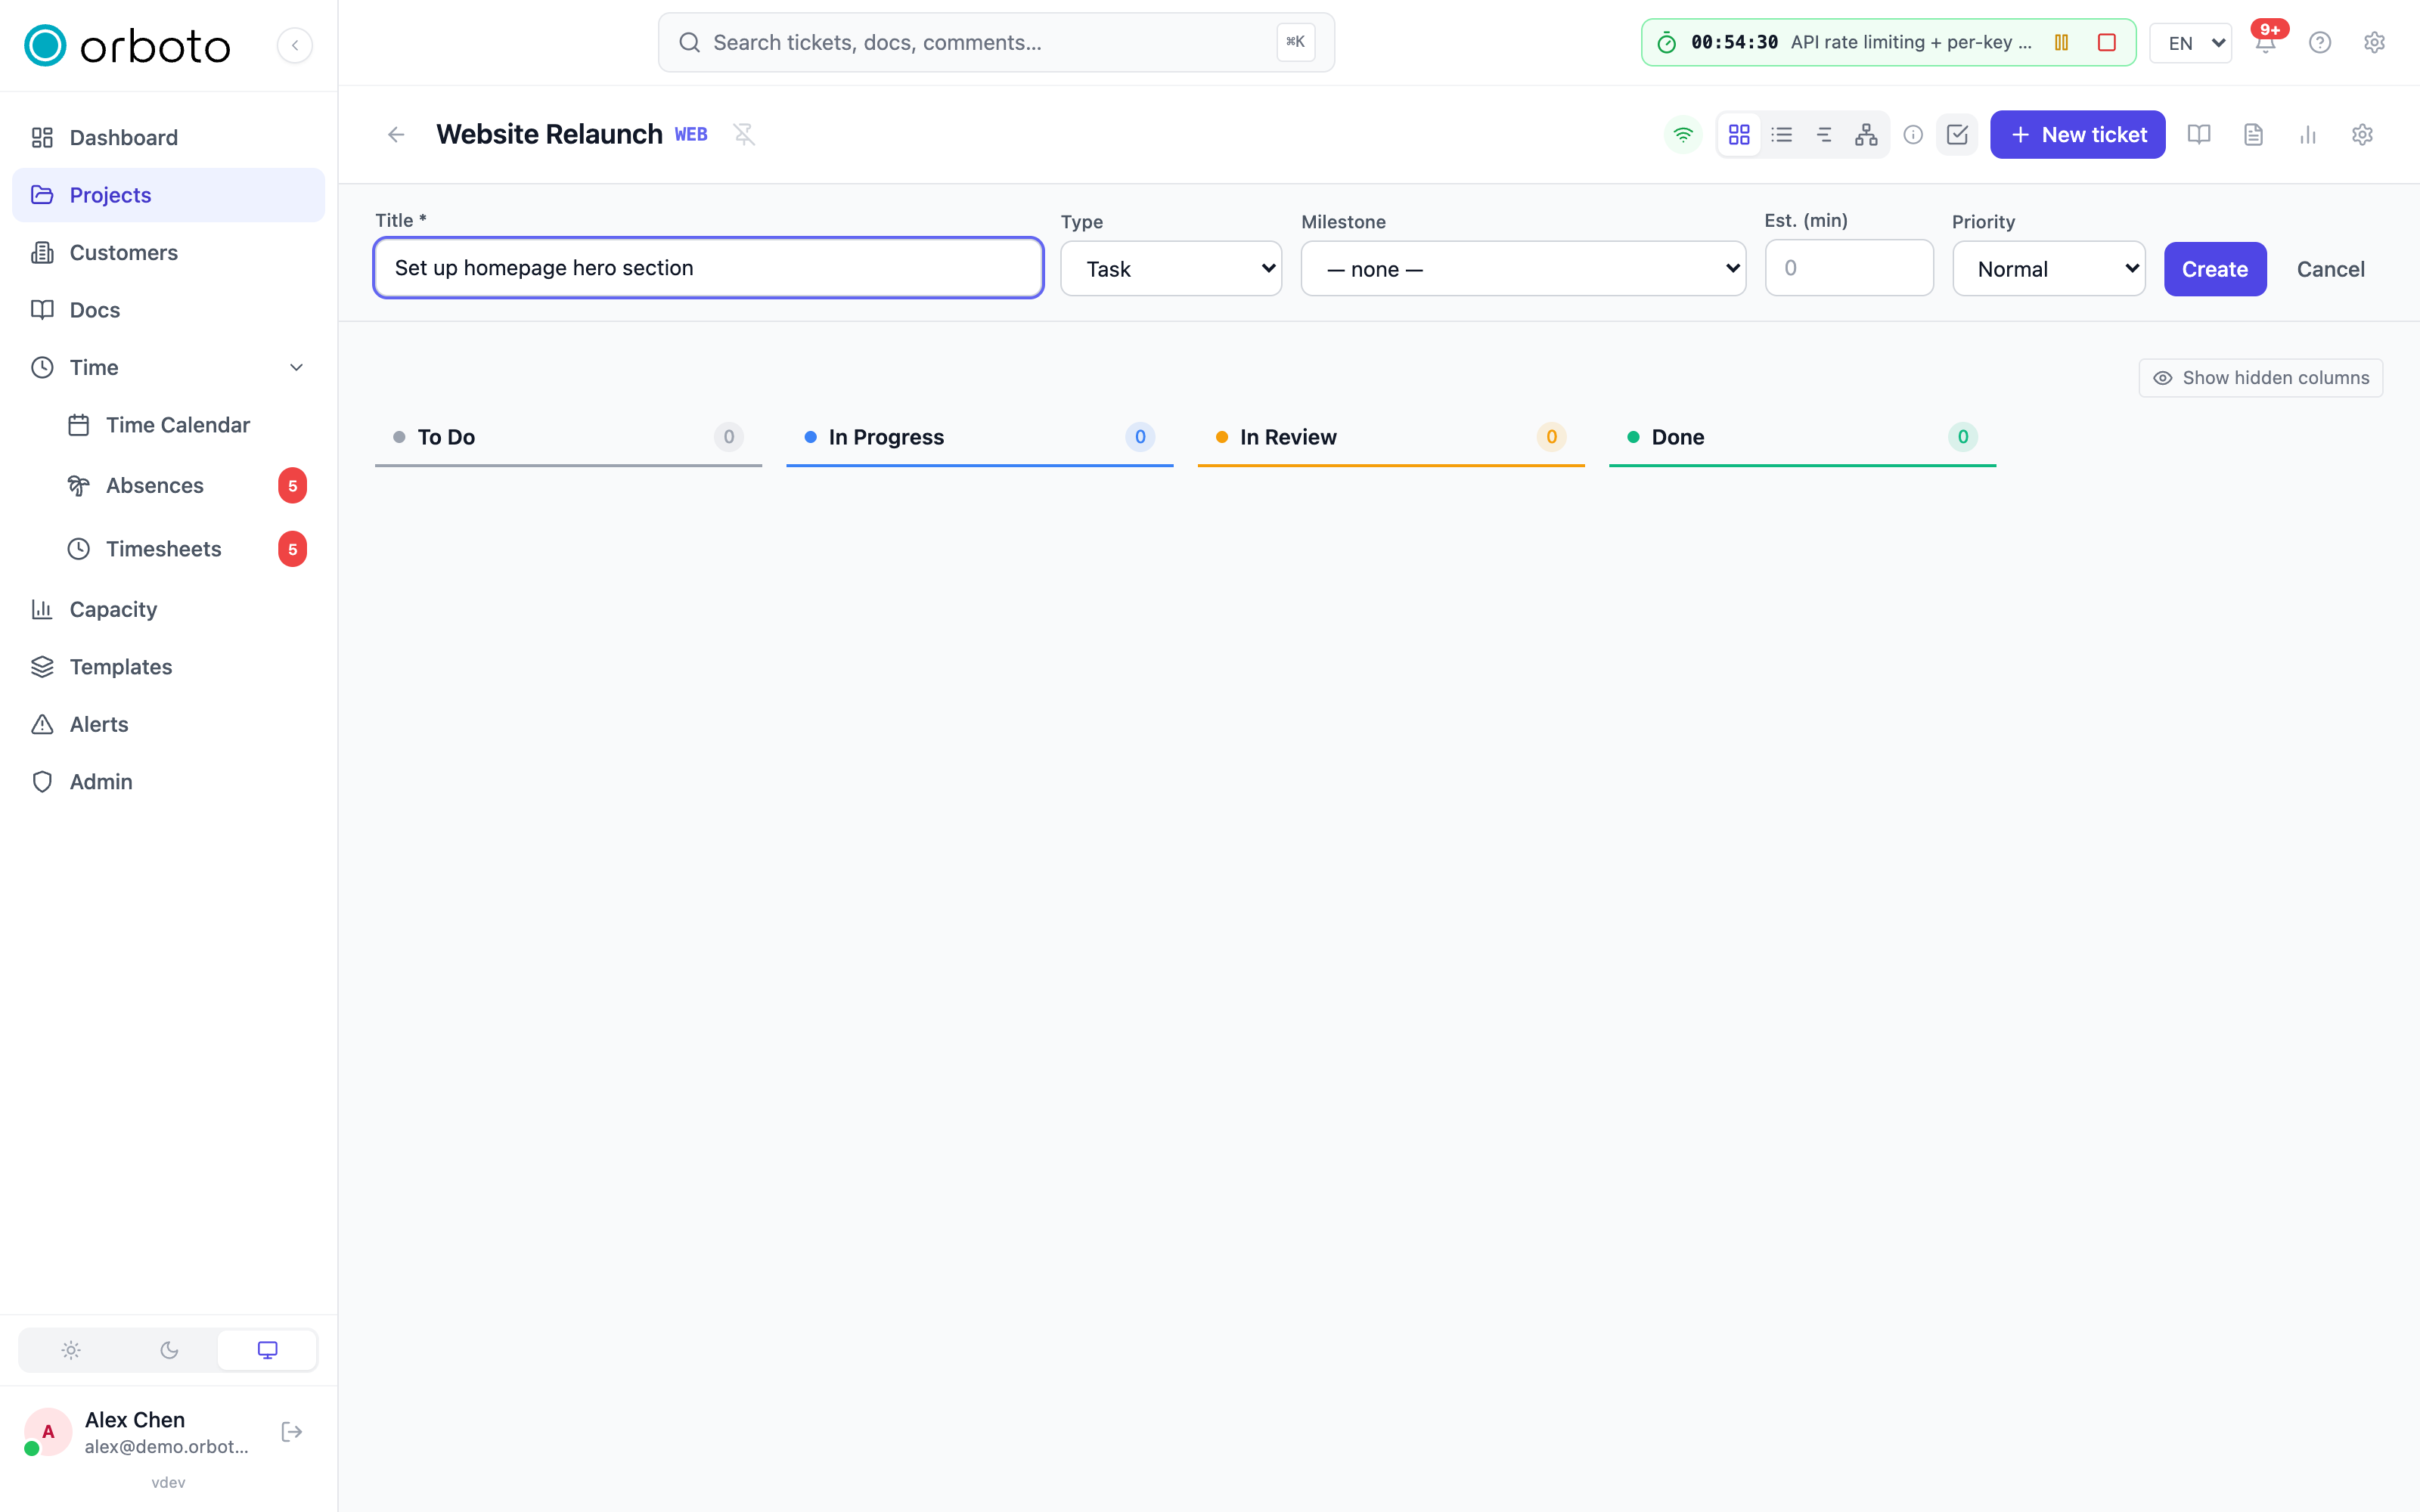
- Fill in the form:
- Title - the only field you must fill in. Keep it short and specific; you write the details in the description below.
- Type -
task,bug,story, orepic. This only changes the icon shown on the card and what you can filter by later - it doesn't restrict what you can do with the ticket. Pickepicif this piece of work is going to be broken down into several smaller tickets under it; picktaskfor anything else if you're not sure. - Priority -
blocker,high,normal,low, ortrivial. Drives sort order, filtering, and (if your admin has configured them) SLA response-time targets and alerts. - Milestone / Version (optional) - only shown once you've created at least one in this project; both default to empty. Leave them unset for now - see Planning and alerts when you're ready to schedule work.
- Estimate (optional) - how long you expect the work to take. Feeds the Gantt view and capacity comparisons once you start using those.
- Add a description with the rich-text editor if you want more detail - it supports formatting, pasted images, and
@mentions, exactly like a comment. - Select Save.
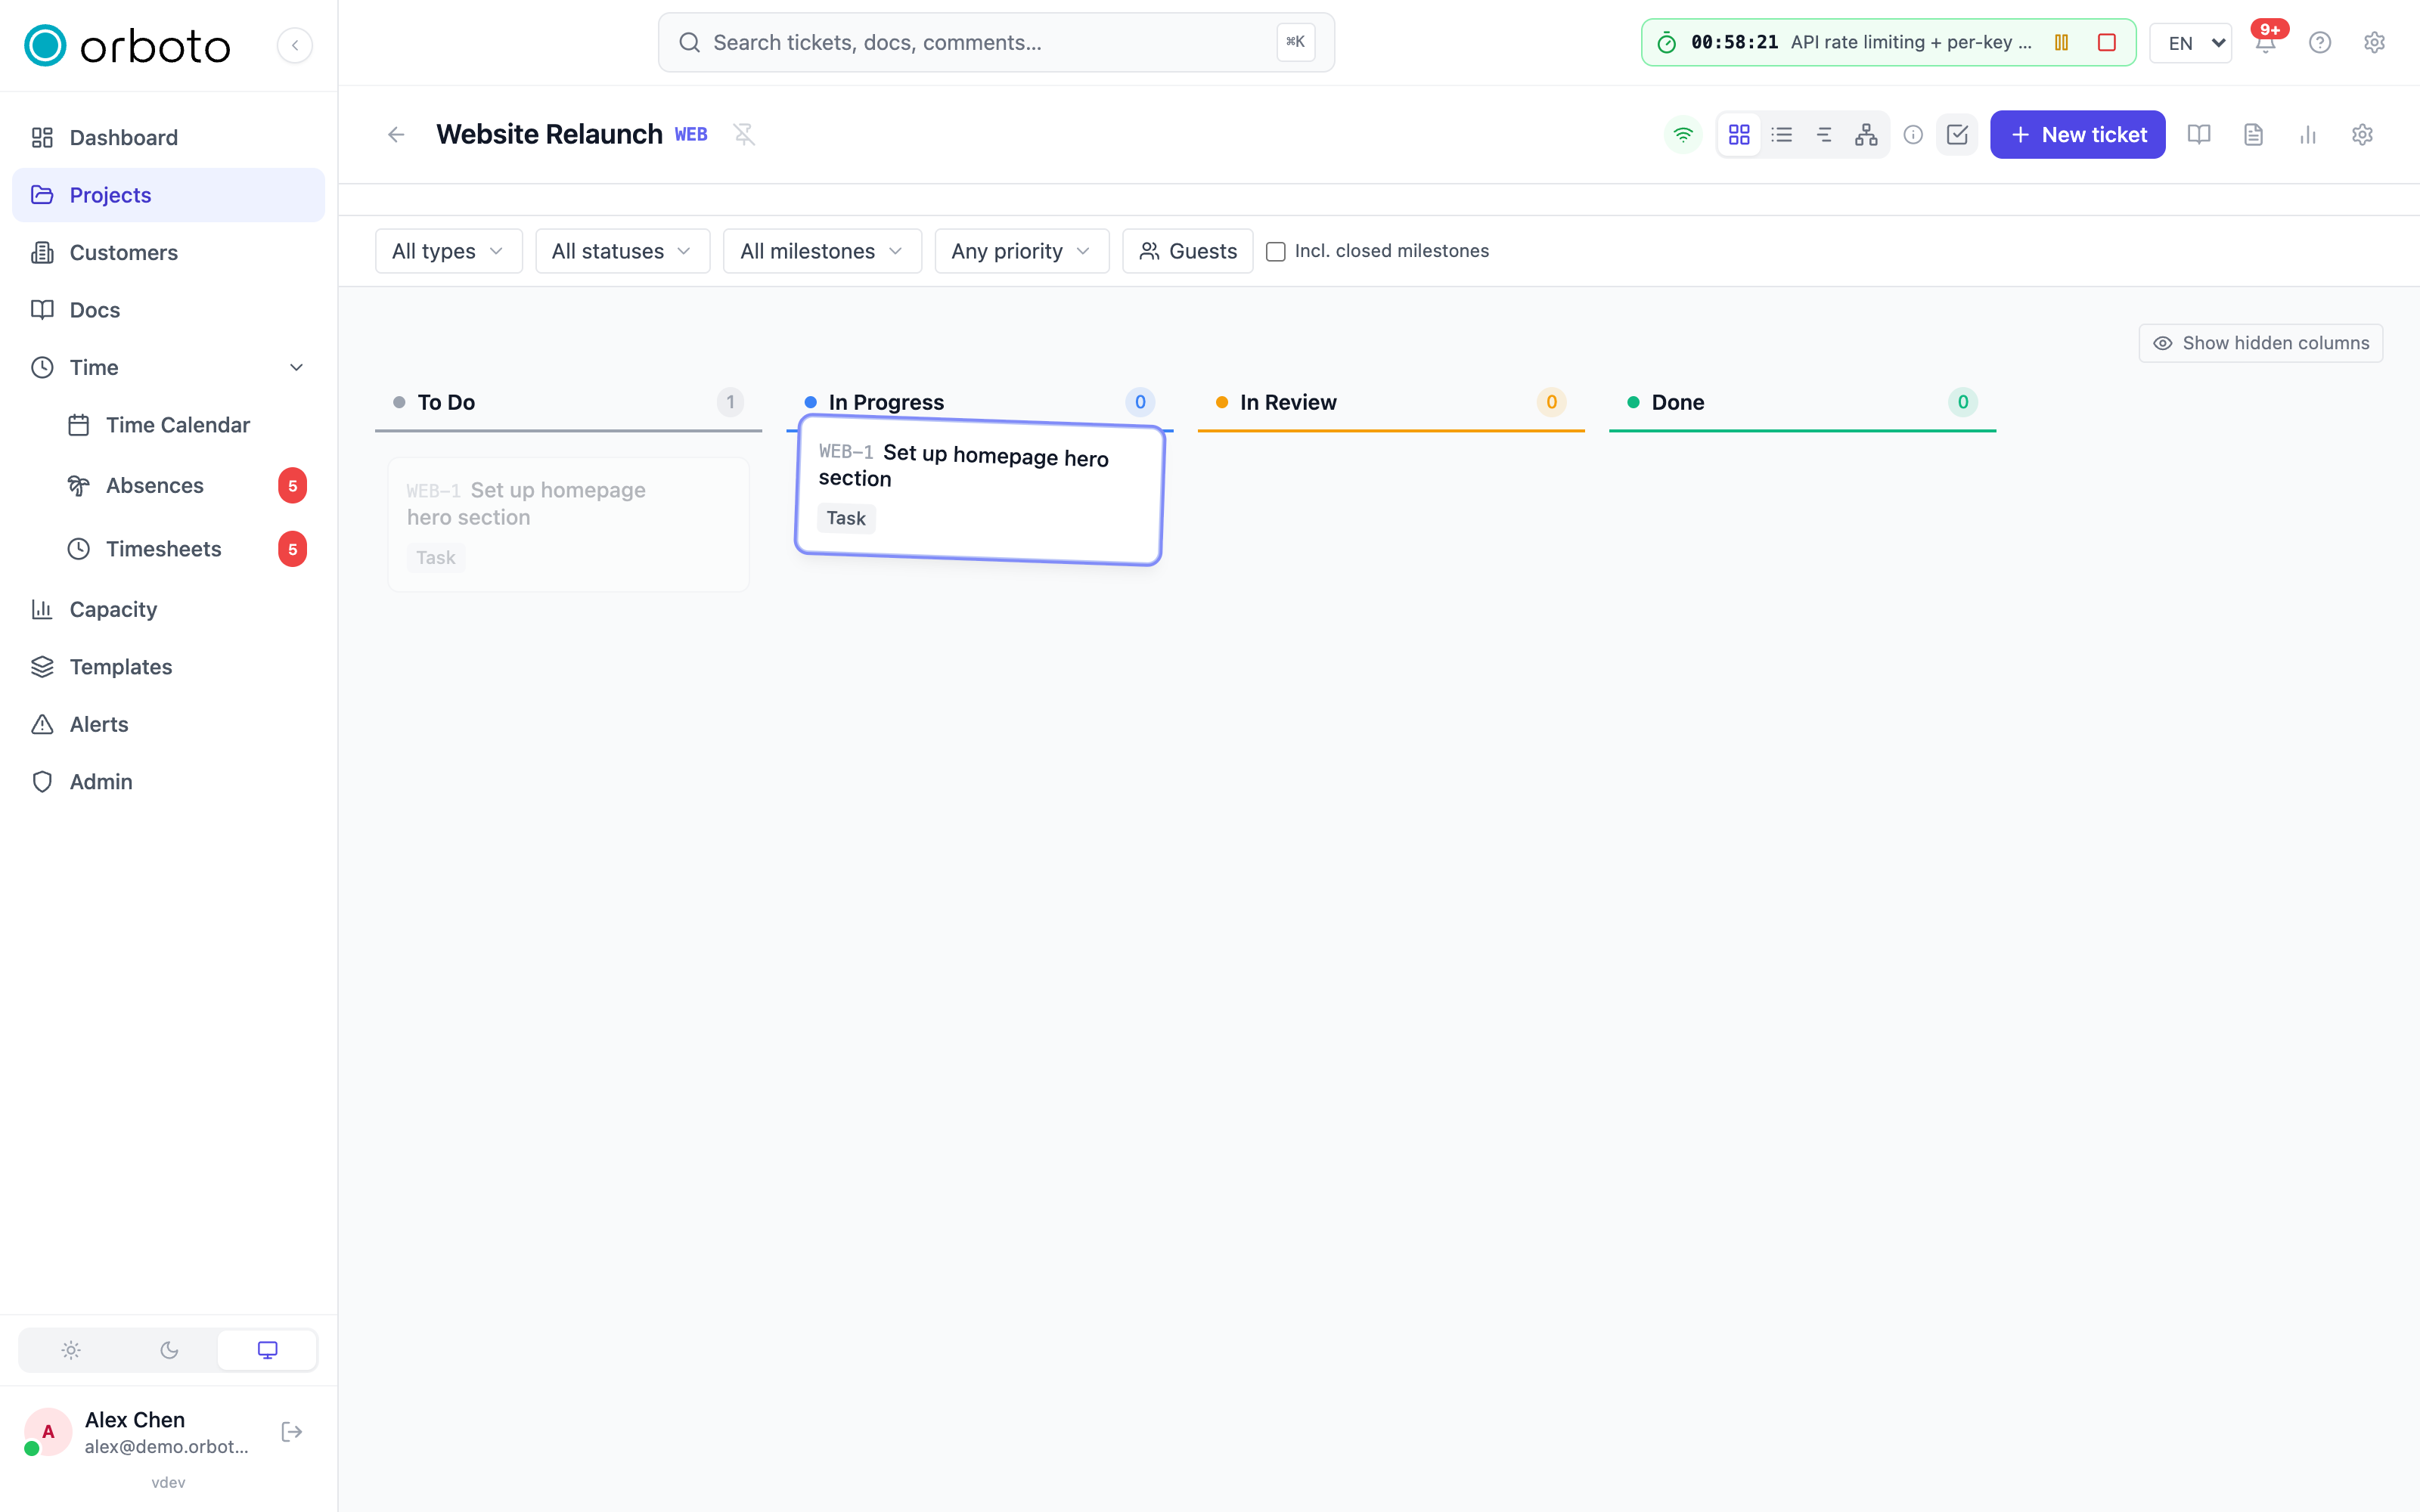
The ticket now shows on the board as WEB-1 (or whichever key your project uses) as a card in the first status column - usually To Do. Selecting the card opens the full ticket detail panel, where every field above is editable again, plus the comment thread, checklists, attachments, and the rest of what a ticket can carry - covered in full in Projects and tickets.
Faster capture. Switch the project to List view. Under any milestone group (or "No milestone"), a dashed + Add ticket row expands into a compact inline form - type, title, due date, and assignee, no description or priority. Press Enter to create it and the row stays open with a cleared title, so you can bang out several tickets in a row without reopening the full dialog each time. Open any of them afterwards to fill in the rest.
3. Move it across the board
Open the Kanban view (the default) and drag the ticket's card from To Do into In Progress, and eventually into Done. Dropping a card into a different column immediately changes the ticket's status field - there is no separate save step, and the change is visible to every other member of the project in real time.
You can achieve the exact same result without dragging: open the ticket and change its Status field directly from the sidebar. Use whichever is faster for you - dragging one card on the board, or changing status from inside a ticket you already have open.
4. Comment and mention a teammate
Open the ticket and scroll to the comment thread at the bottom. Type a comment, format it with the toolbar if you like, and type @ followed by a name to mention a teammate - typing @ opens an autocomplete list of project members, and selecting one inserts the mention and, once you post the comment, sends that person a notification. This is the normal way work gets discussed in orboto instead of a side channel: the discussion stays attached to the ticket forever, instead of scattered across chat history.
5. Optional: log time against it
If your workspace tracks time, open the ticket and look for the timer control in its sidebar - start it while you work and stop it when you're done, or add a manual time entry with a specific date and duration if you're logging after the fact. See Time tracking for the full picture - the stopwatch, the time calendar, and timesheets.
Where to go next
- The full picture of projects, views, and everything a ticket can do: Projects and tickets
- Every term you just met, explained: Concepts and glossary
- Find anything fast across your whole workspace: Search
- Write documentation alongside your work: Docs and wiki
Troubleshooting
The status column I want isn't on the board. Cause: your administrator can mark some statuses as hidden on the board by default, to keep it tidy for everyday use. Fix: look for a Show hidden columns toggle above the board and turn it on - it also shows how many tickets are tucked away in hidden columns.
I created a ticket but can no longer find it in the list. Cause: the filter bar above the board keeps whatever filter you last set (type, priority, milestone, and so on), and your new ticket may not match it - a common trap is a stale milestone filter after you leave the milestone field unset. Fix: select Clear on the filter bar to reset every filter at once.
The Milestone or Version dropdown is empty. Cause: nothing has been created yet in this project - both are optional and set up per project, not pre-populated. Fix: leave it unset and create milestones/versions later in project settings, or skip straight to Planning and alerts.
The project key I typed was rejected. Cause: keys must be 2 to 10 letters or digits, and must be unique within your workspace - another project may already hold it. Fix: try a different, still-short key; the form tells you immediately if there's a collision.