

Time tracking
Track effort with the stopwatch or the Time Calendar, gather it into timesheets, and subscribe to it from an external calendar.
orboto records the time you spend on work under the Time group in the sidebar: Time Calendar and Timesheets. A running stopwatch also lives in the top bar so you can start and stop timing from anywhere. Requesting time off has its own page - see Absences - and team-wide workload is covered in Capacity planning.
Timesheets are for internal team members. Guest and external users see only the Time Calendar, and only if it has been enabled for them.
The stopwatch (timer)
The timer in the top bar is the quickest way to track effort as it happens.

- Start a timer on a ticket (from the ticket, or by claiming work). The elapsed time counts up in the top bar.
- Pause / resume when you step away.
- Stop when you finish - orboto writes the elapsed minutes as a time entry against that ticket, using the note you set when you started.
Only one stopwatch runs at a time. If you start timing a second ticket, orboto commits the time on the first one before switching, so nothing is lost.
Time Calendar
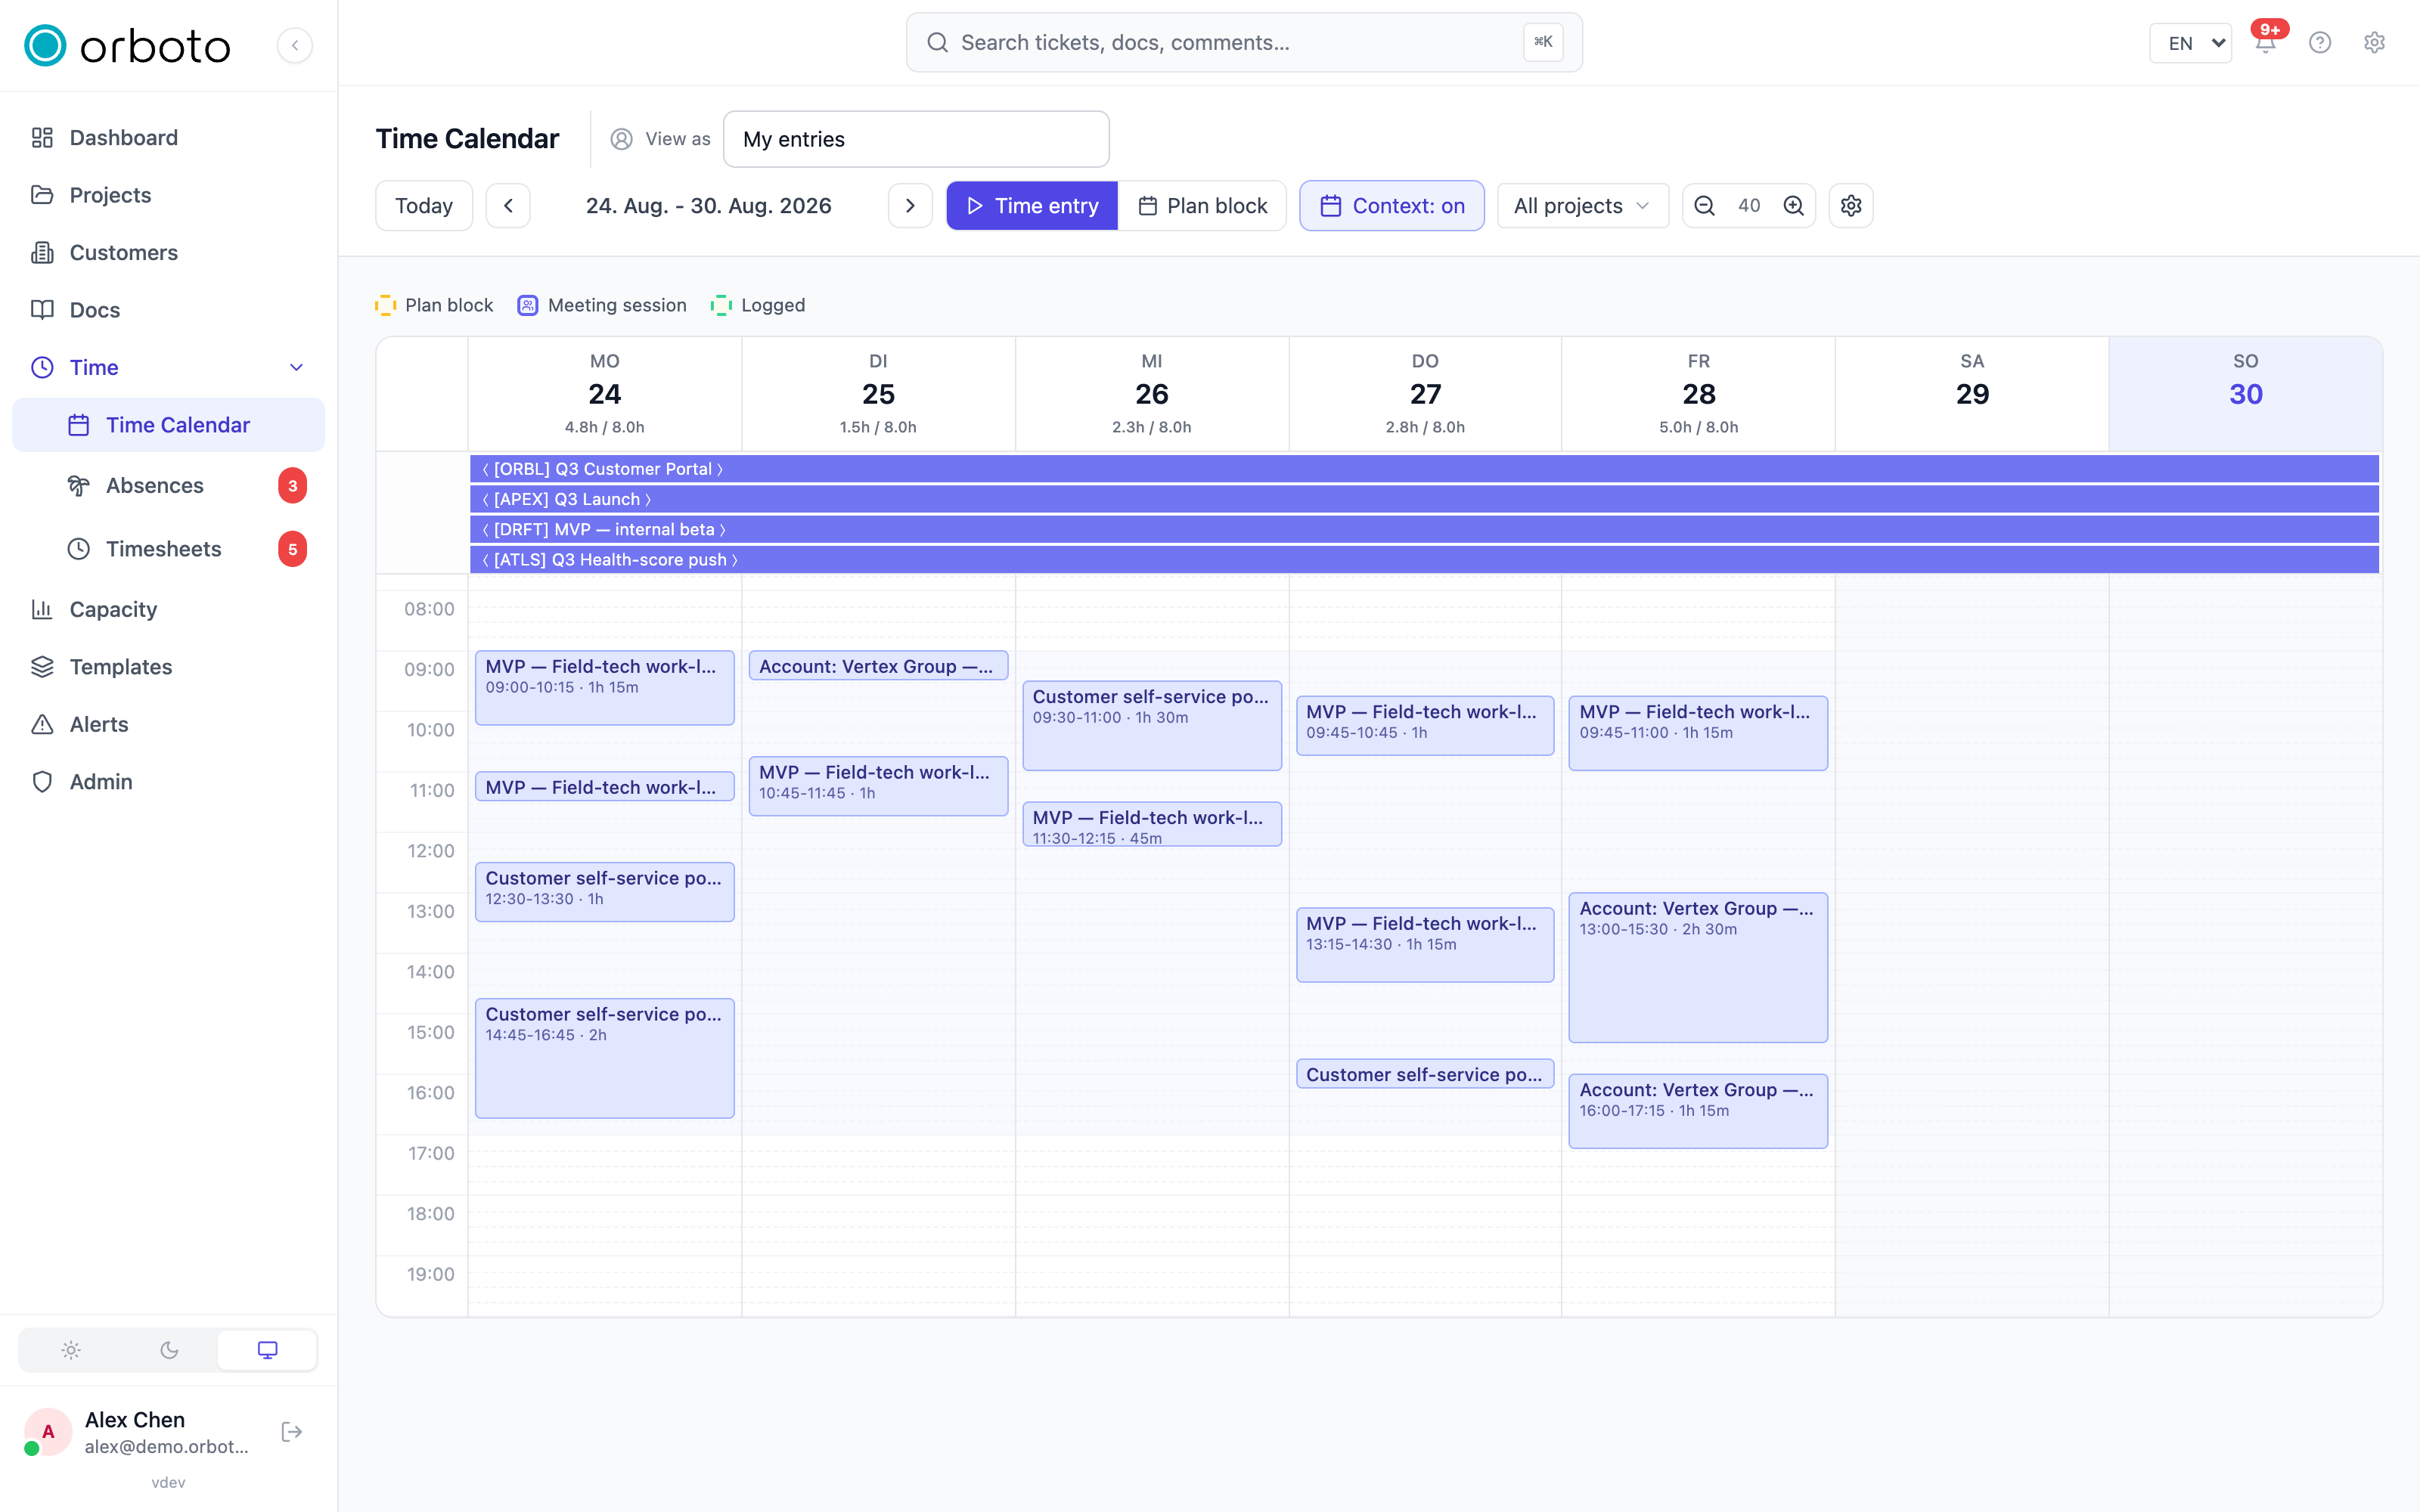
The Time Calendar shows a week at a time, one column per day, with your logged time laid out as blocks so you can see where your hours went and fill any gaps.
Logging and planning time
The calendar has two ways to add something to a slot, picked by the Time entry / Plan block toggle in the header:
- Click an empty slot for a quick add at that hour, or click and drag to sweep out an exact start time and duration.
- With the toggle on Time entry, this logs actual time against a ticket right away.
- With the toggle on Plan block, it books a slot ahead of time without logging anything yet - useful for blocking your calendar before the work happens. Open a plan block and select Convert to entry to turn it into a real, logged time entry once the work is done (it needs a ticket assigned first - edit the block to add one if it doesn't have one yet). A converted block becomes read-only.
- Shift+click a slot to open an absence request pre-filled with that day - see Absences.
Either dialog asks for the project, ticket, date, duration, and an optional note. Existing blocks can be dragged to move them or resized from either edge to change their duration.
You can edit or delete an entry later, as long as it isn't part of an already-approved timesheet (see below).
Reading the calendar
- Your work-hours window is shaded, and the grid auto-scrolls to it when you open the page.
- Non-working days and blocked days (public holidays, company closures, approved absences) are shaded and hatched.
- Each day header shows your logged vs. goal hours for the day, turning green once you've hit your target.
- Use the zoom control to make the grid more compact or roomier.
- If you're an administrator, a View as picker lets you inspect another user's logged time (their plan blocks stay private).
The context overlay
Toggle Context to show a strip above the grid with your current milestones (as spanning bars), version releases, and ticket due dates for the visible week - so you can see what's due while you plan your time. Narrow it to specific projects with the project filter next to the toggle.
Calendar settings
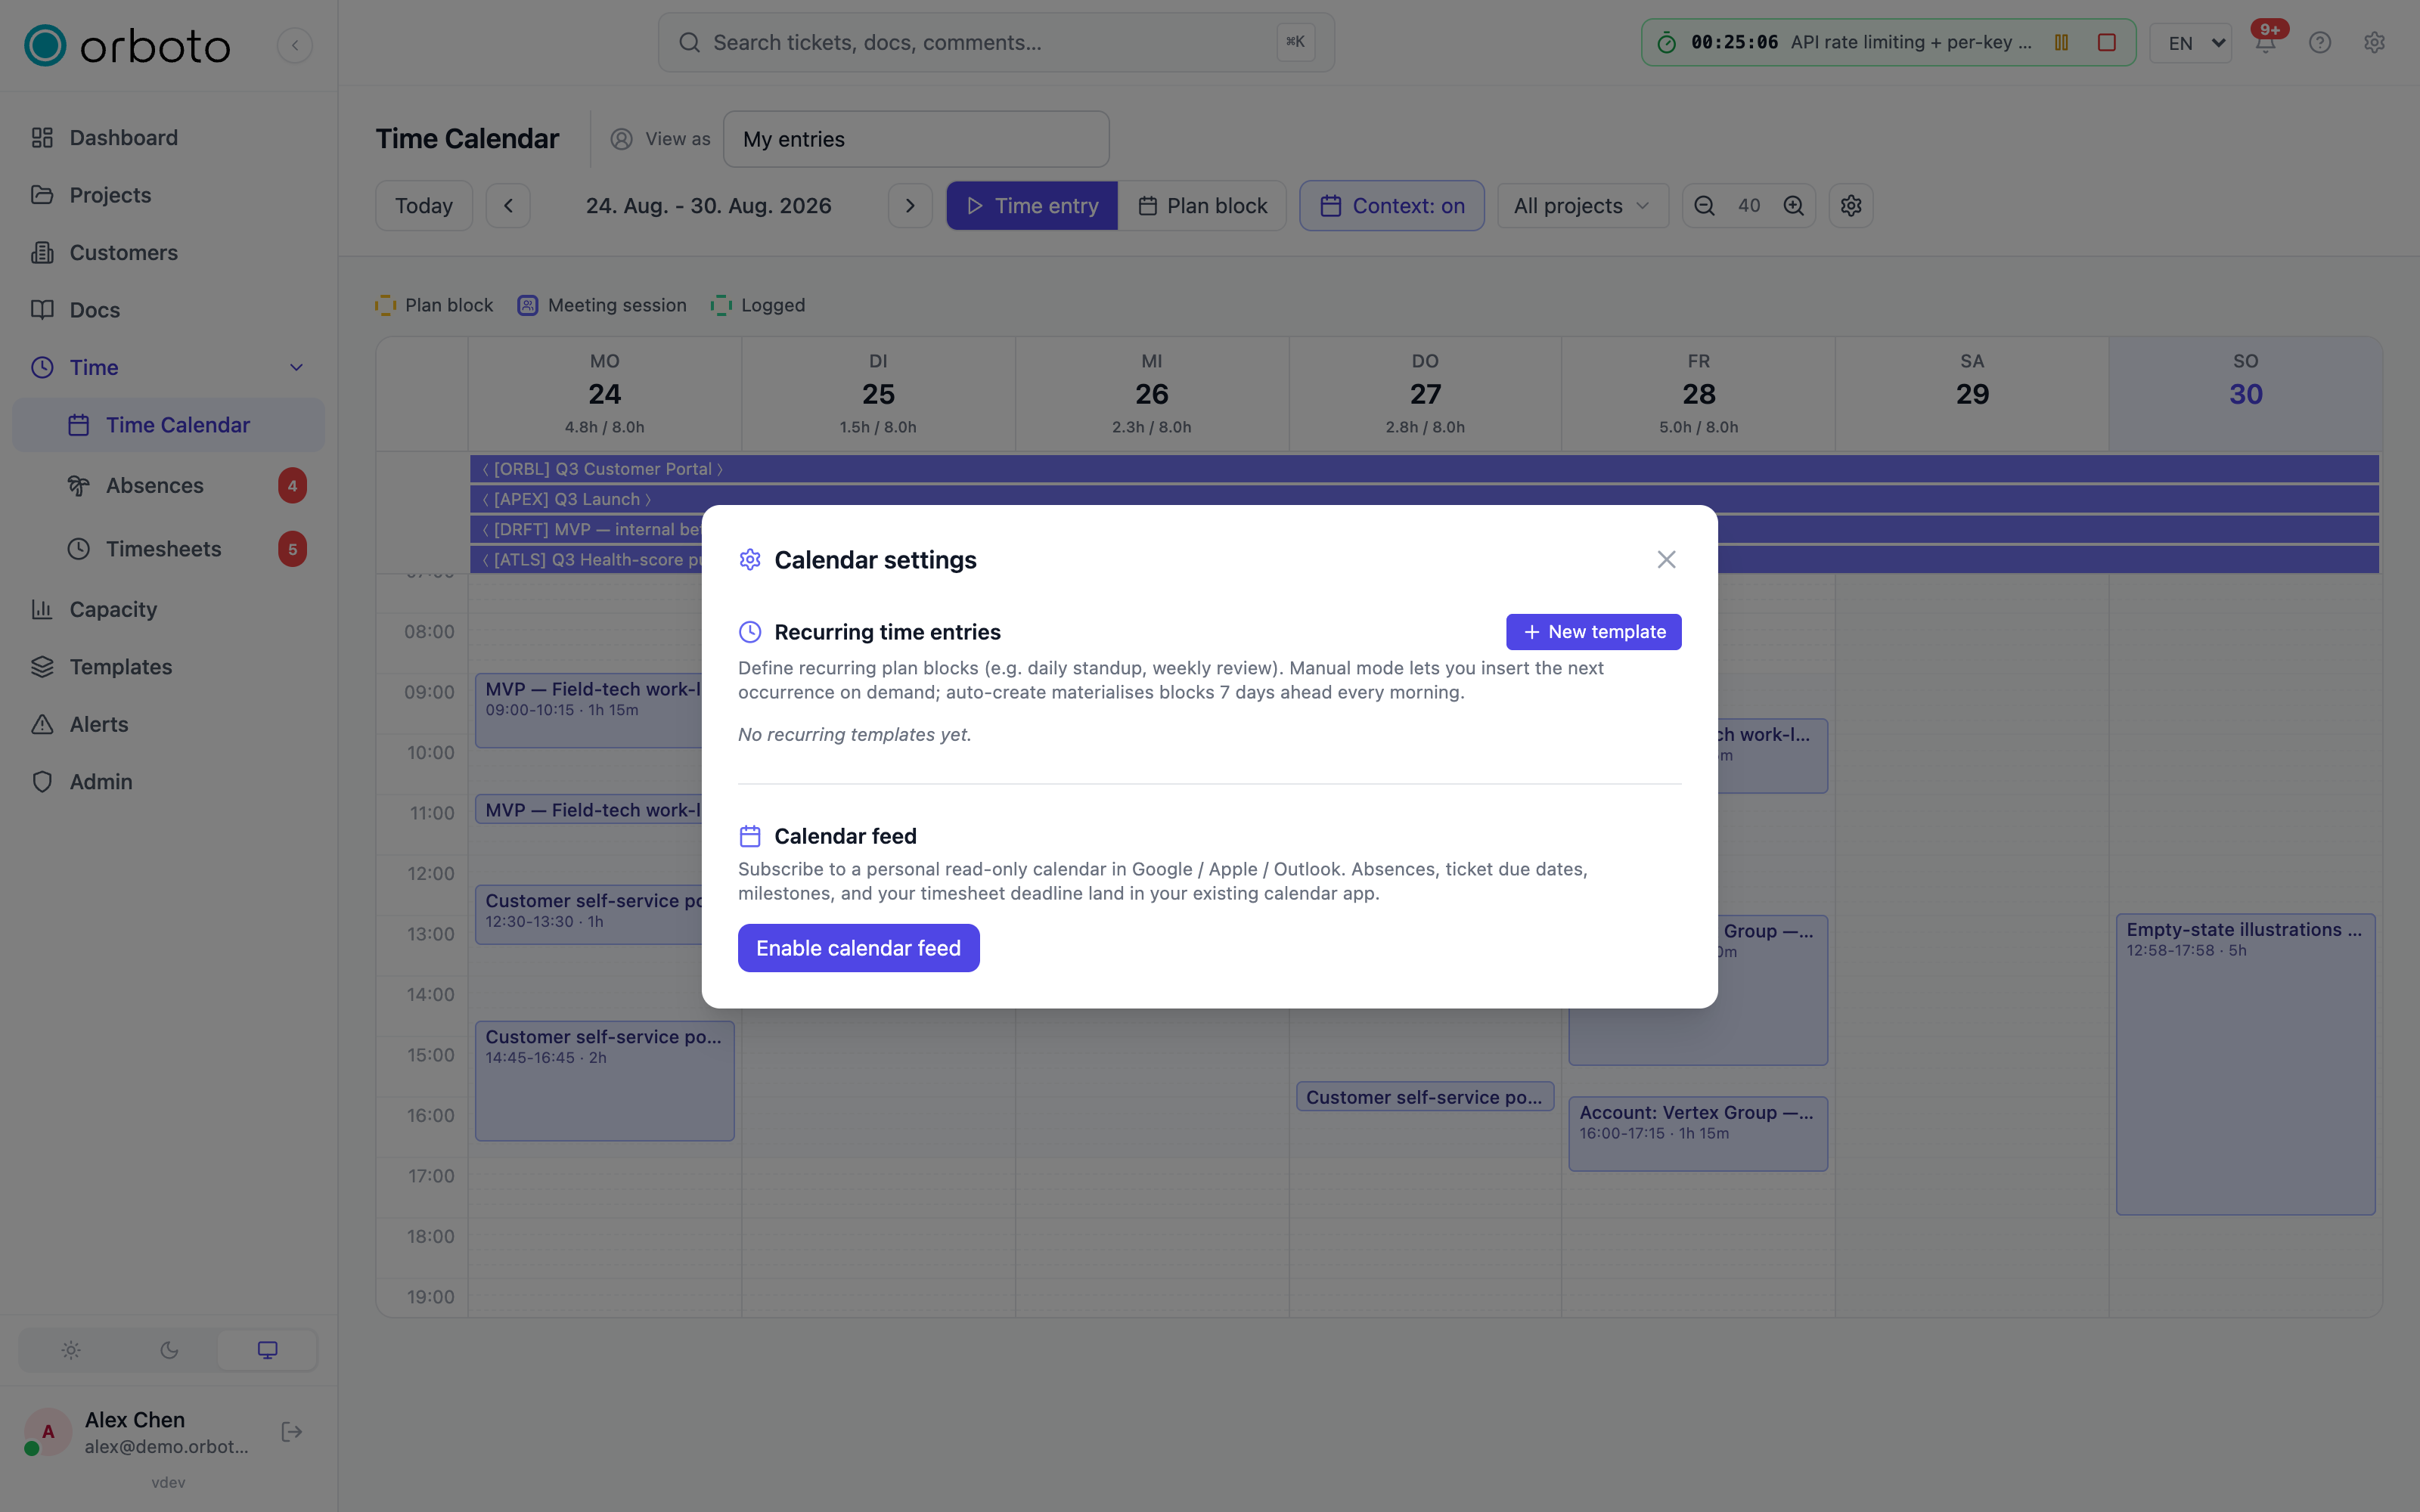
The gear icon opens:
- Recurring time-entry templates - save a frequently used entry (project, ticket, duration, note, and a recurrence pattern) and insert its next occurrence as a plan block with one click instead of retyping it.
- Subscribe feed - a personal, read-only calendar URL (webcal/ICS) you can add to an external calendar app. Choose what it includes: absences, ticket due dates, milestones, and timesheet deadlines. Regenerate the URL at any time to invalidate the old one.
Timesheets
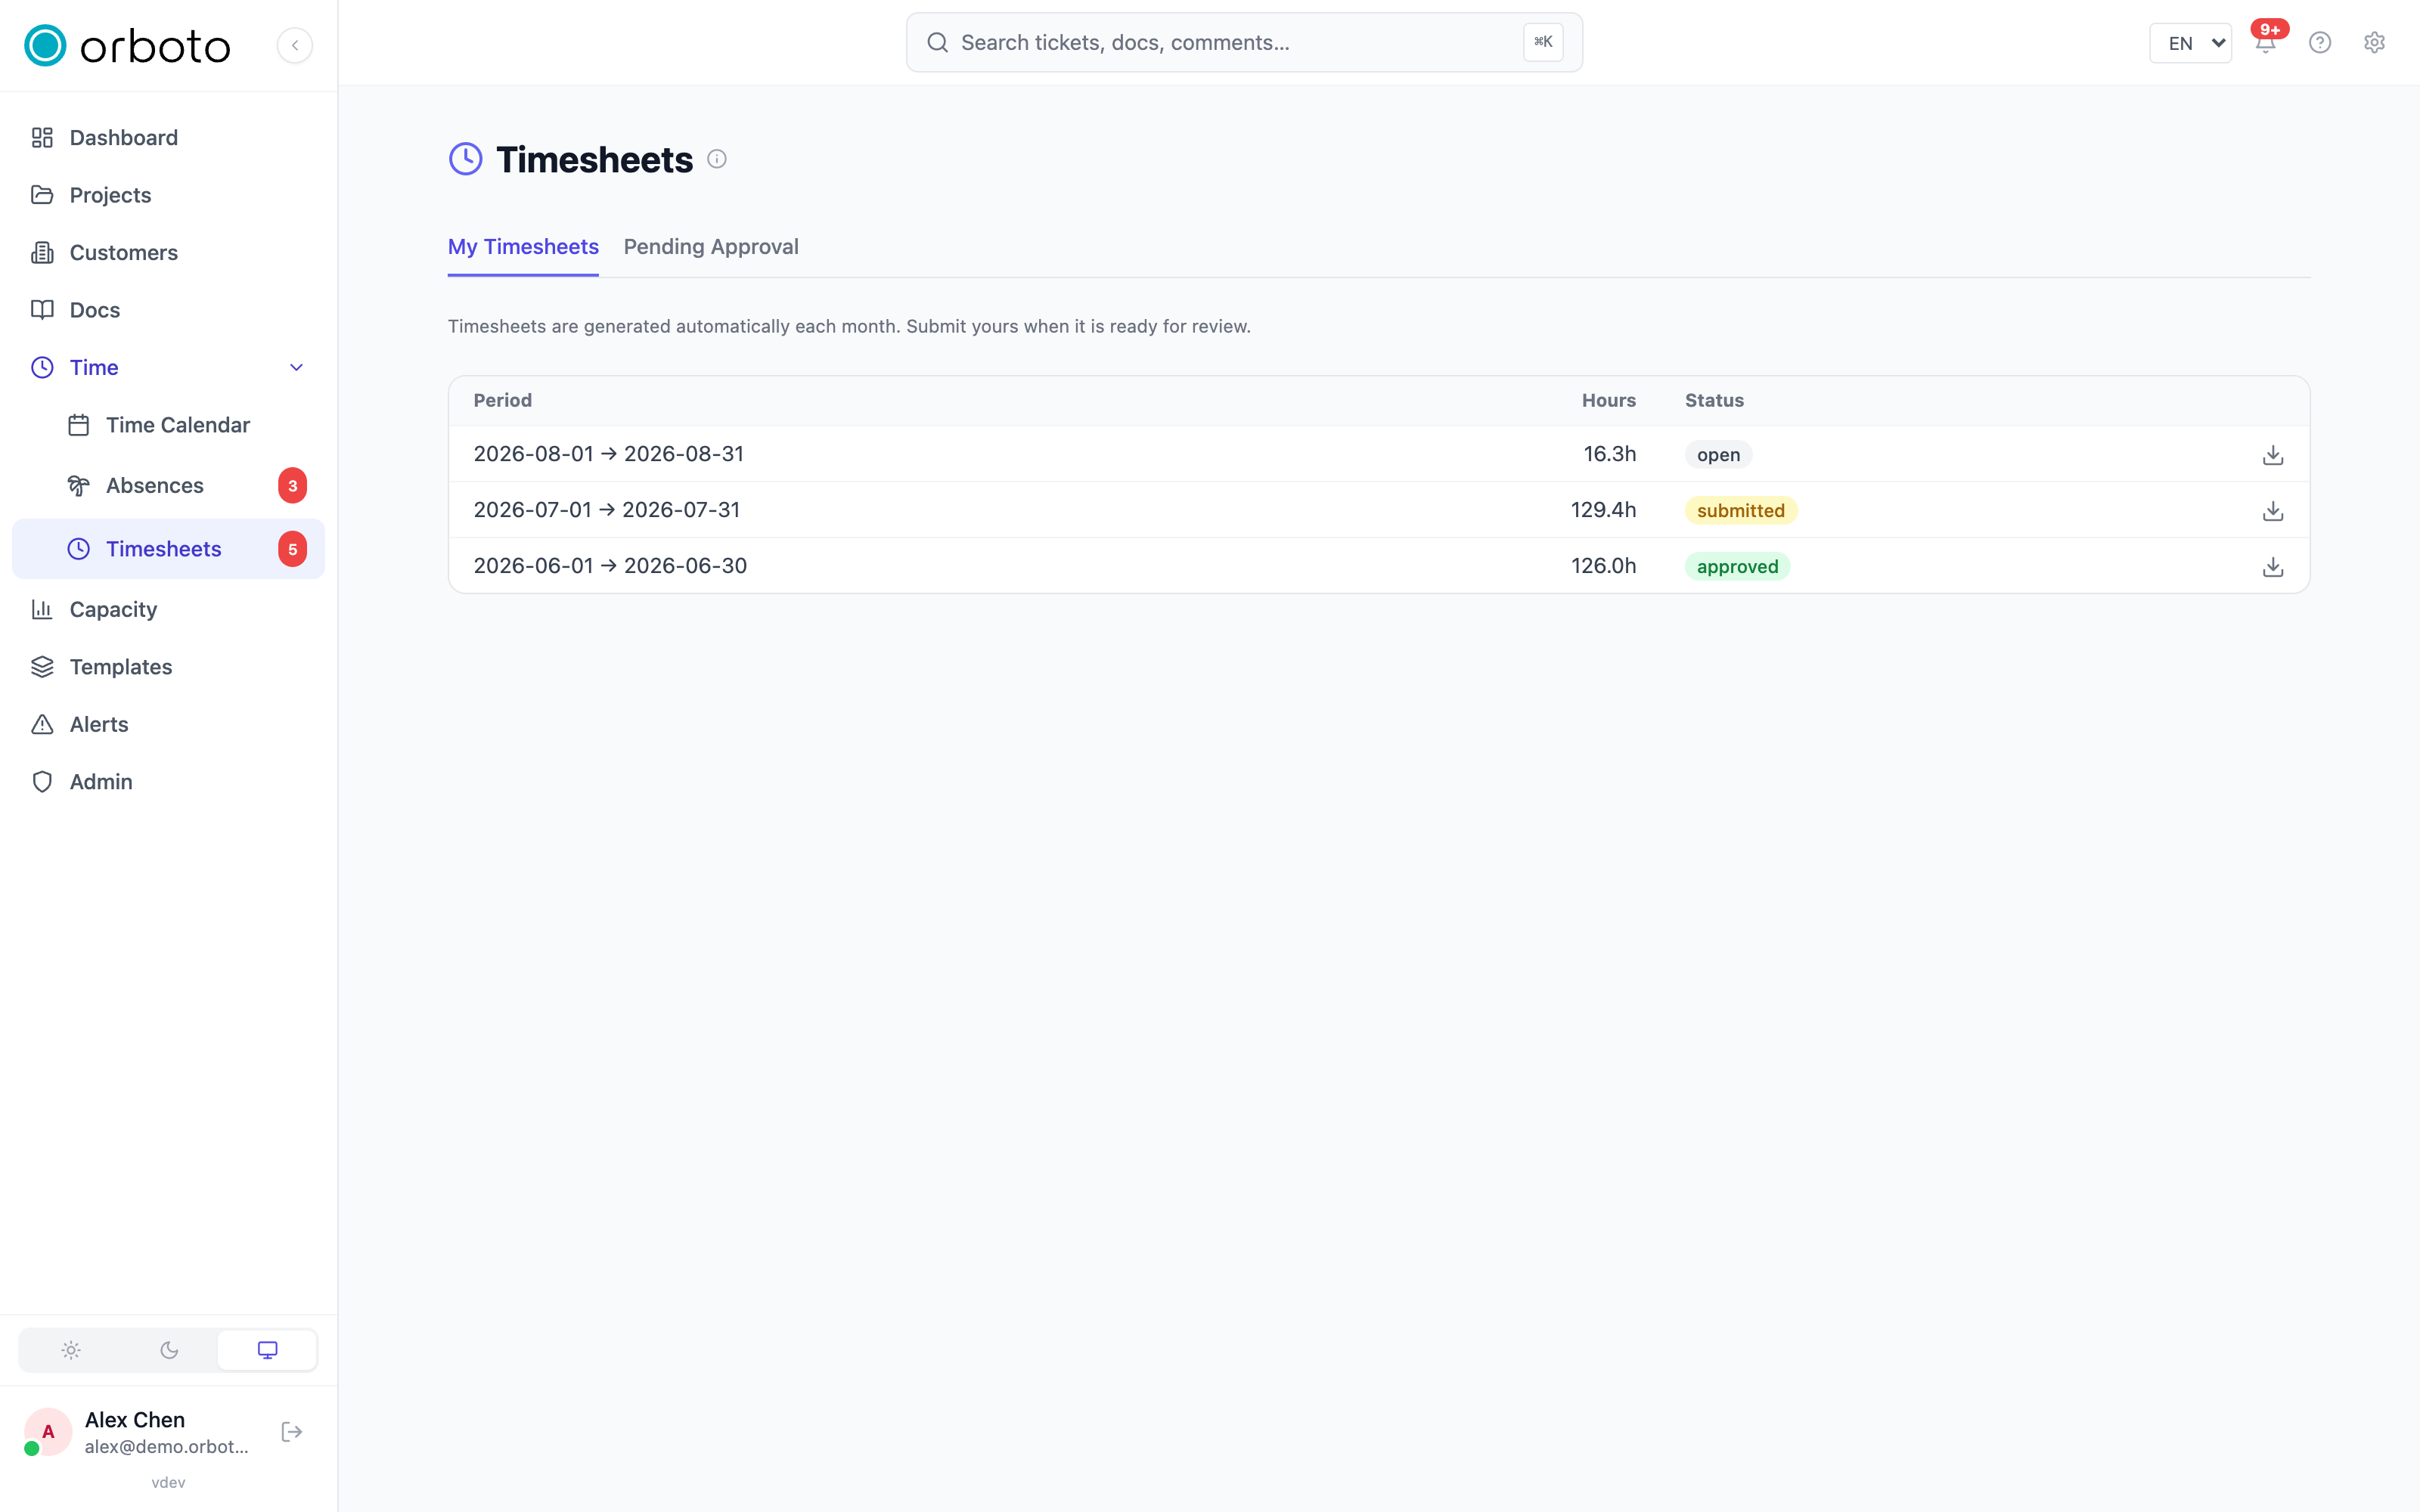
A timesheet is your logged time for a period (for example a month), gathered up for approval. Open Timesheets in the sidebar; the Mine tab is generated automatically from your time entries, no manual step required.
- Select a period to open its detail view - every entry, grouped by date, project, and ticket.
- While the timesheet is open (or rejected), select any entry to edit it inline, or edit it from the Time Calendar.
- Select Submit to send it for approval. Its status moves to submitted, then to approved or rejected.
- If rejected, the reason is shown so you can correct the entries and resubmit.
- Once approved, every entry in it is locked - you can no longer edit or delete them, from either the timesheet or the Time Calendar.
If you approve timesheets, the Pending tab lists everyone's submitted timesheets waiting on you, with Approve or Reject (with a required reason) on each row. Select PDF on any timesheet, yours or a team member's, to download a formatted export.
Troubleshooting
I can't edit a time entry. It's locked into an approved timesheet. Ask your approver to reject the timesheet (with a reason) if the entry genuinely needs correcting - that reopens it for editing.
My drag on the calendar created the wrong thing. Check the Time entry / Plan block toggle in the header before you drag - it decides what a click-and-drag gesture produces, and it's remembered across sessions.
The subscribe feed isn't showing new events in my calendar app. Most external calendar apps cache a webcal/ICS feed and refresh it on their own schedule (often hourly), not instantly - give it time, or manually refresh the subscription in that app.
A plan block won't disappear after I logged the real time. Open it and select Convert to entry instead of logging a separate time entry - deleting the block just discards the plan without logging anything, and a converted block can't be deleted afterwards (it's now the real entry).