

Working with tickets
Create a ticket, work it through the ticket detail panel, change many at once, and write with the rich-text editor.
A ticket is a single unit of work inside a project. This page covers creating one, everything you can do inside its detail panel, changing many tickets at once, and the editor they all share.
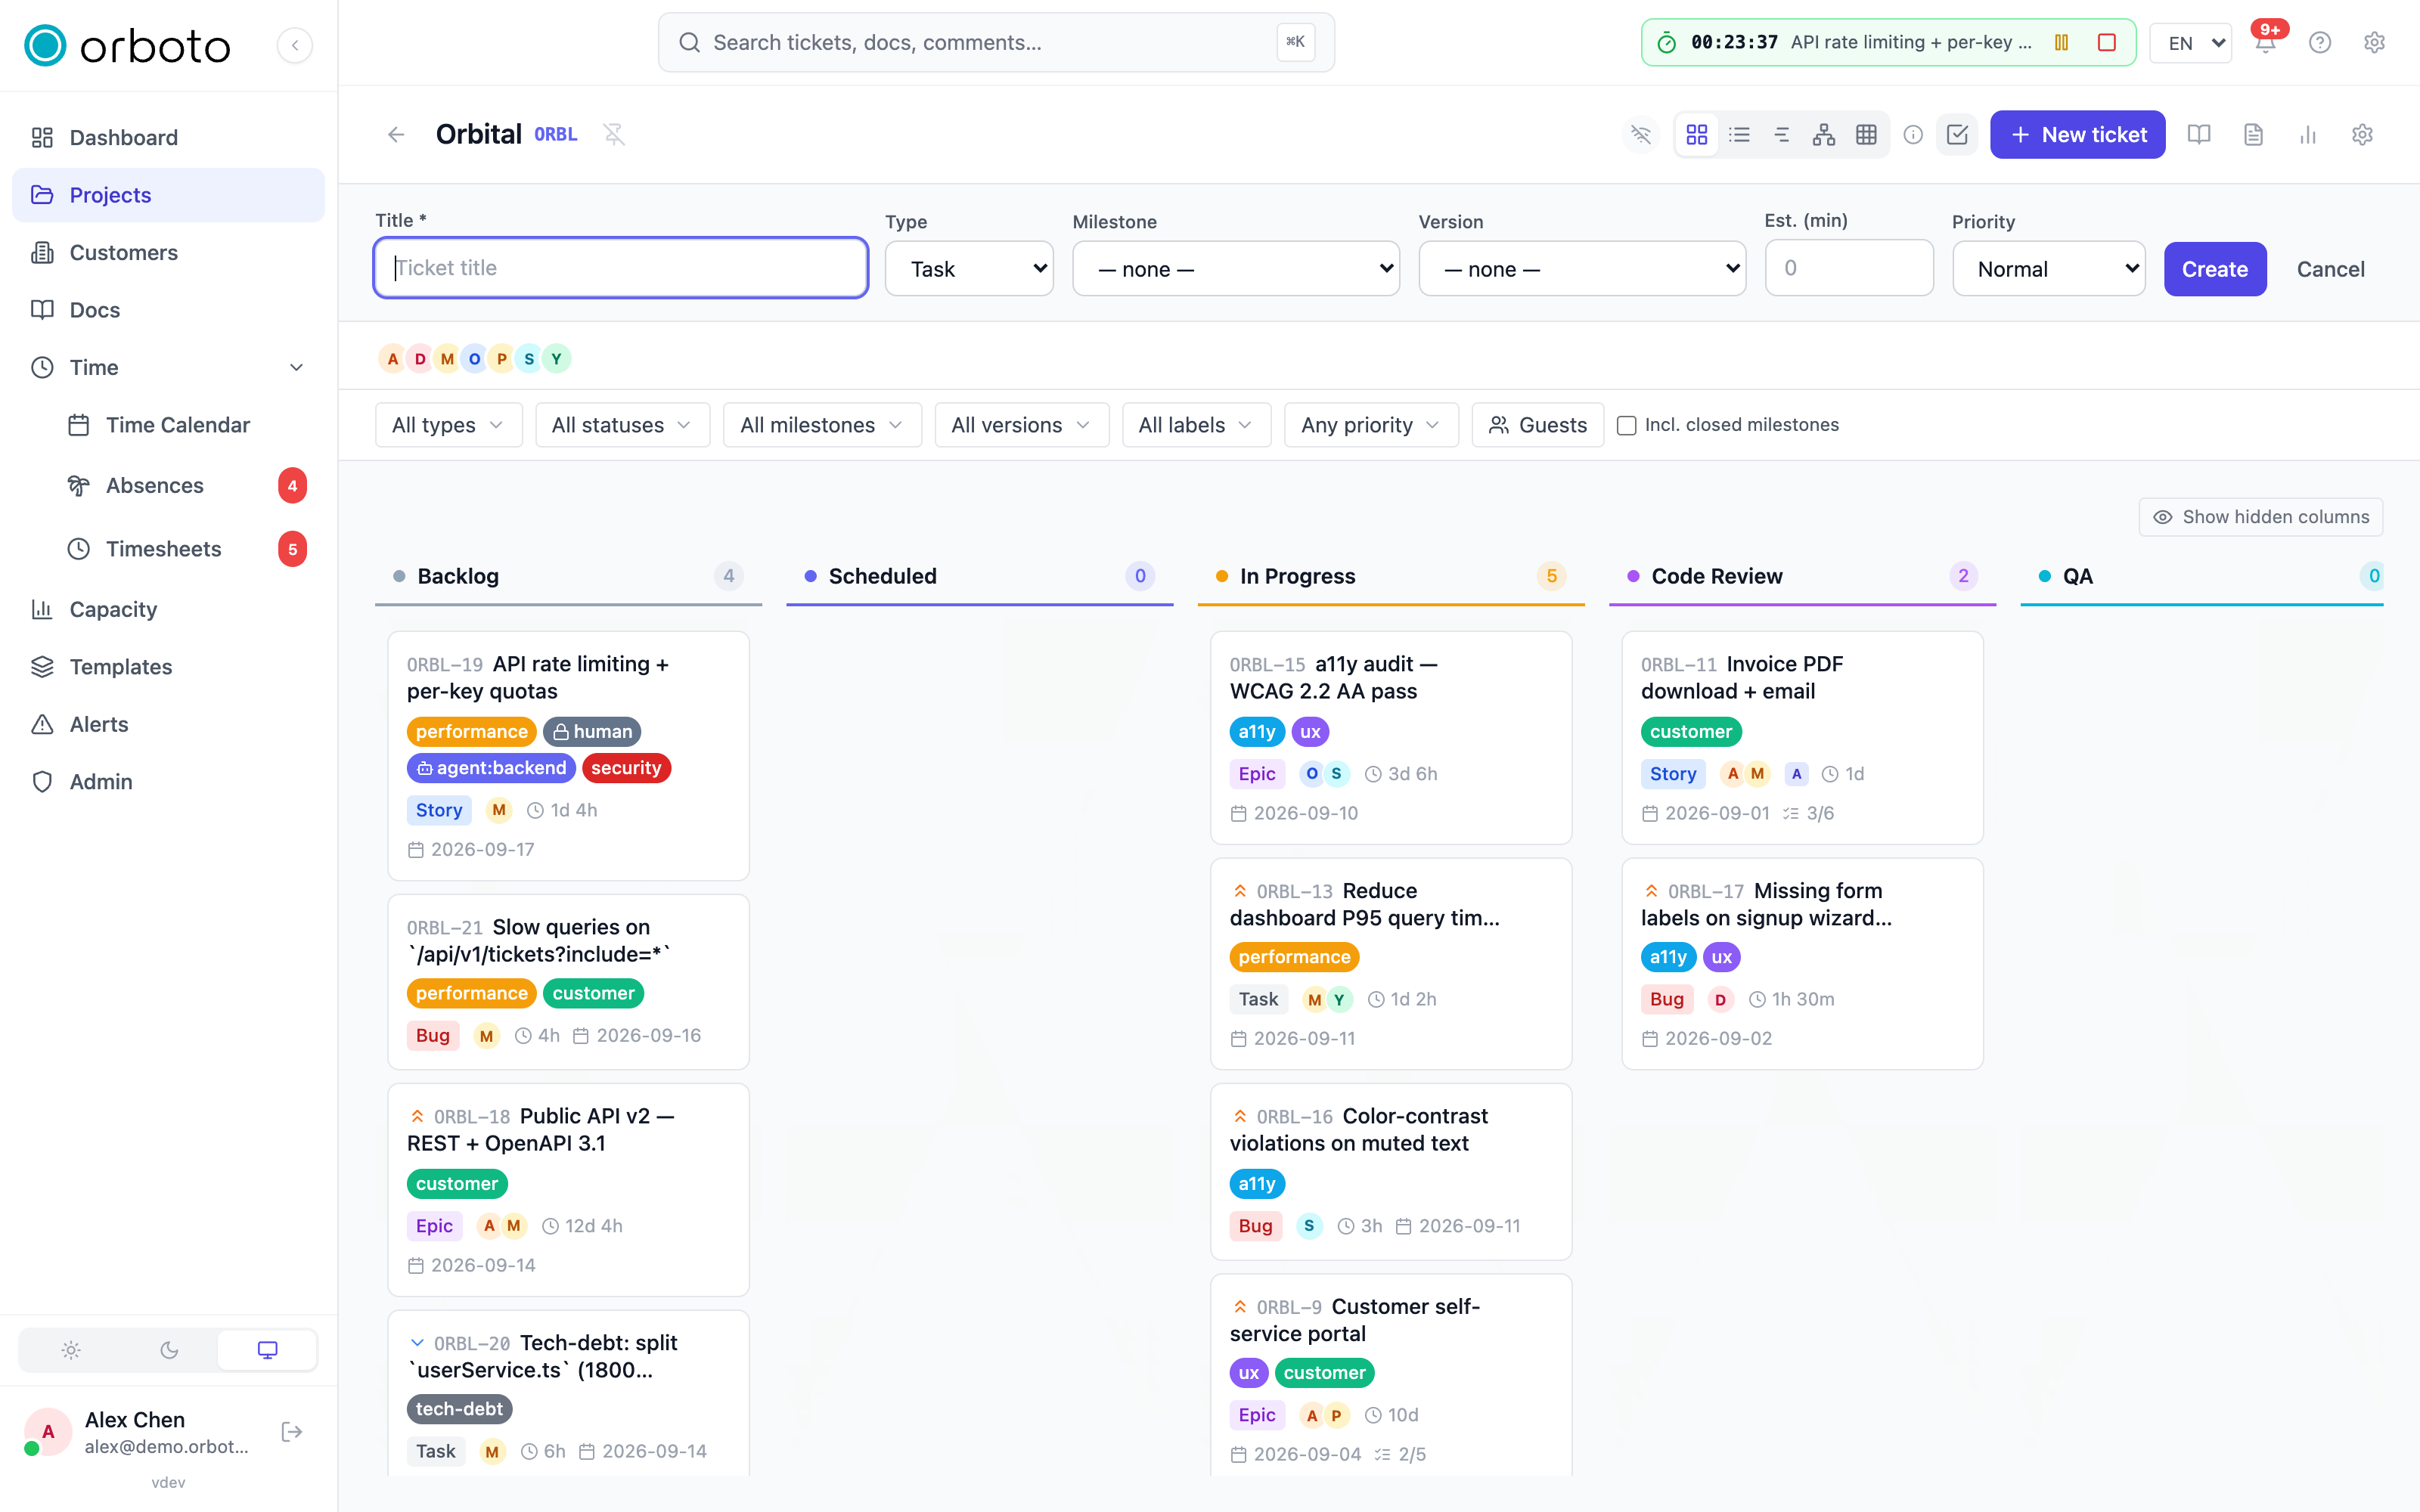
Creating a ticket
- In a project, select New ticket.
- Enter a title. Optionally set the type, priority, milestone, version, and an estimate (how long you expect it to take).
- Add a description using the rich-text editor (see Writing with the editor).
- Save.
For quick capture, the List view offers an inline quick-add row - type a title and press Enter to create a ticket without opening the full form.
Working inside a ticket
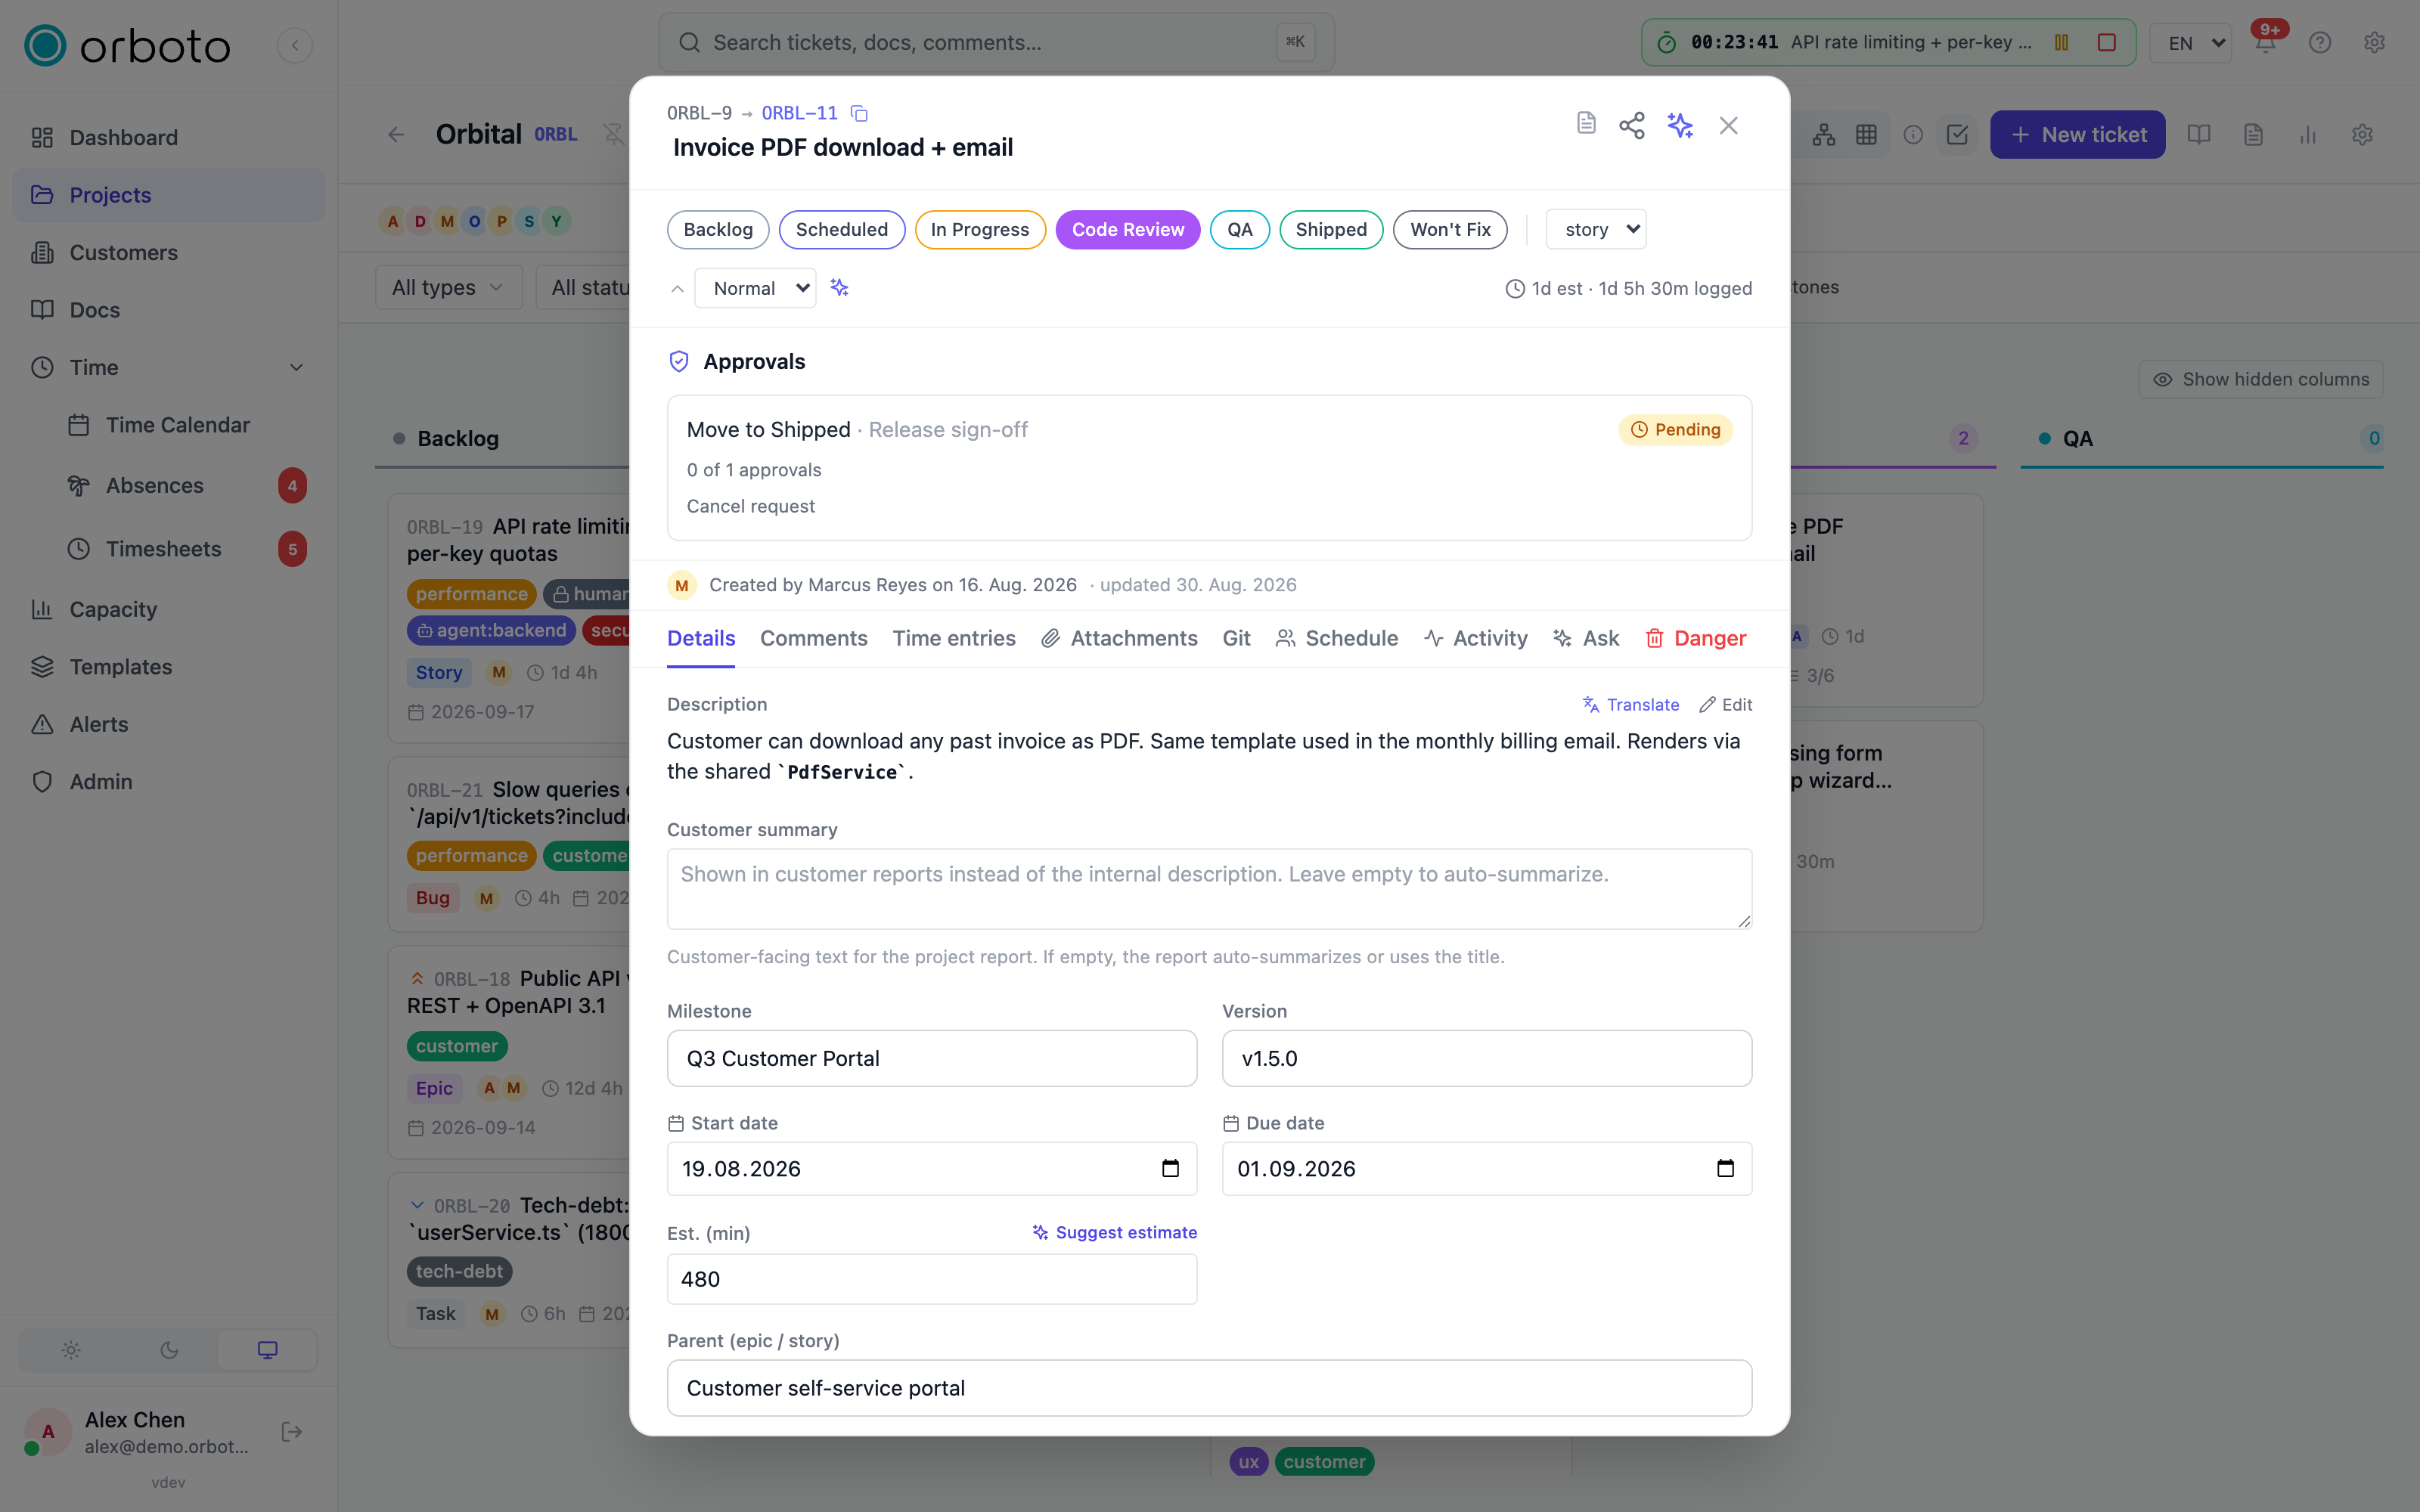
Select any ticket card or row to open the ticket detail panel. This is where most day-to-day work happens.
Editing the basics
- Title and description - select to edit in place. The description uses the rich-text editor.
- Status - move the ticket to another status without going back to the board.
- Priority, type, milestone, version - set from the ticket's sidebar.
- Assignees - add one or more people responsible for the ticket. Tickets support multiple assignees.
- Start and due dates - set the schedule; these feed the Gantt view and deadline alerts.
- Estimate - record how long you think the ticket will take; this feeds capacity planning.
- Private - mark a ticket private so only people on its access list can see it.
RACI on a ticket
Beyond assignees, you can set the RACI roles (Responsible, Accountable, Consulted, Informed) directly on a ticket. These roll up into the project's RACI view.
Comments
Discuss the ticket in the comment thread at the bottom. Comments use the rich-text editor, so you can format text, paste images, and @mention teammates to notify them. You can edit or delete your own comments, and a comment's revision history lets you see earlier versions of an edited comment.
Checklists
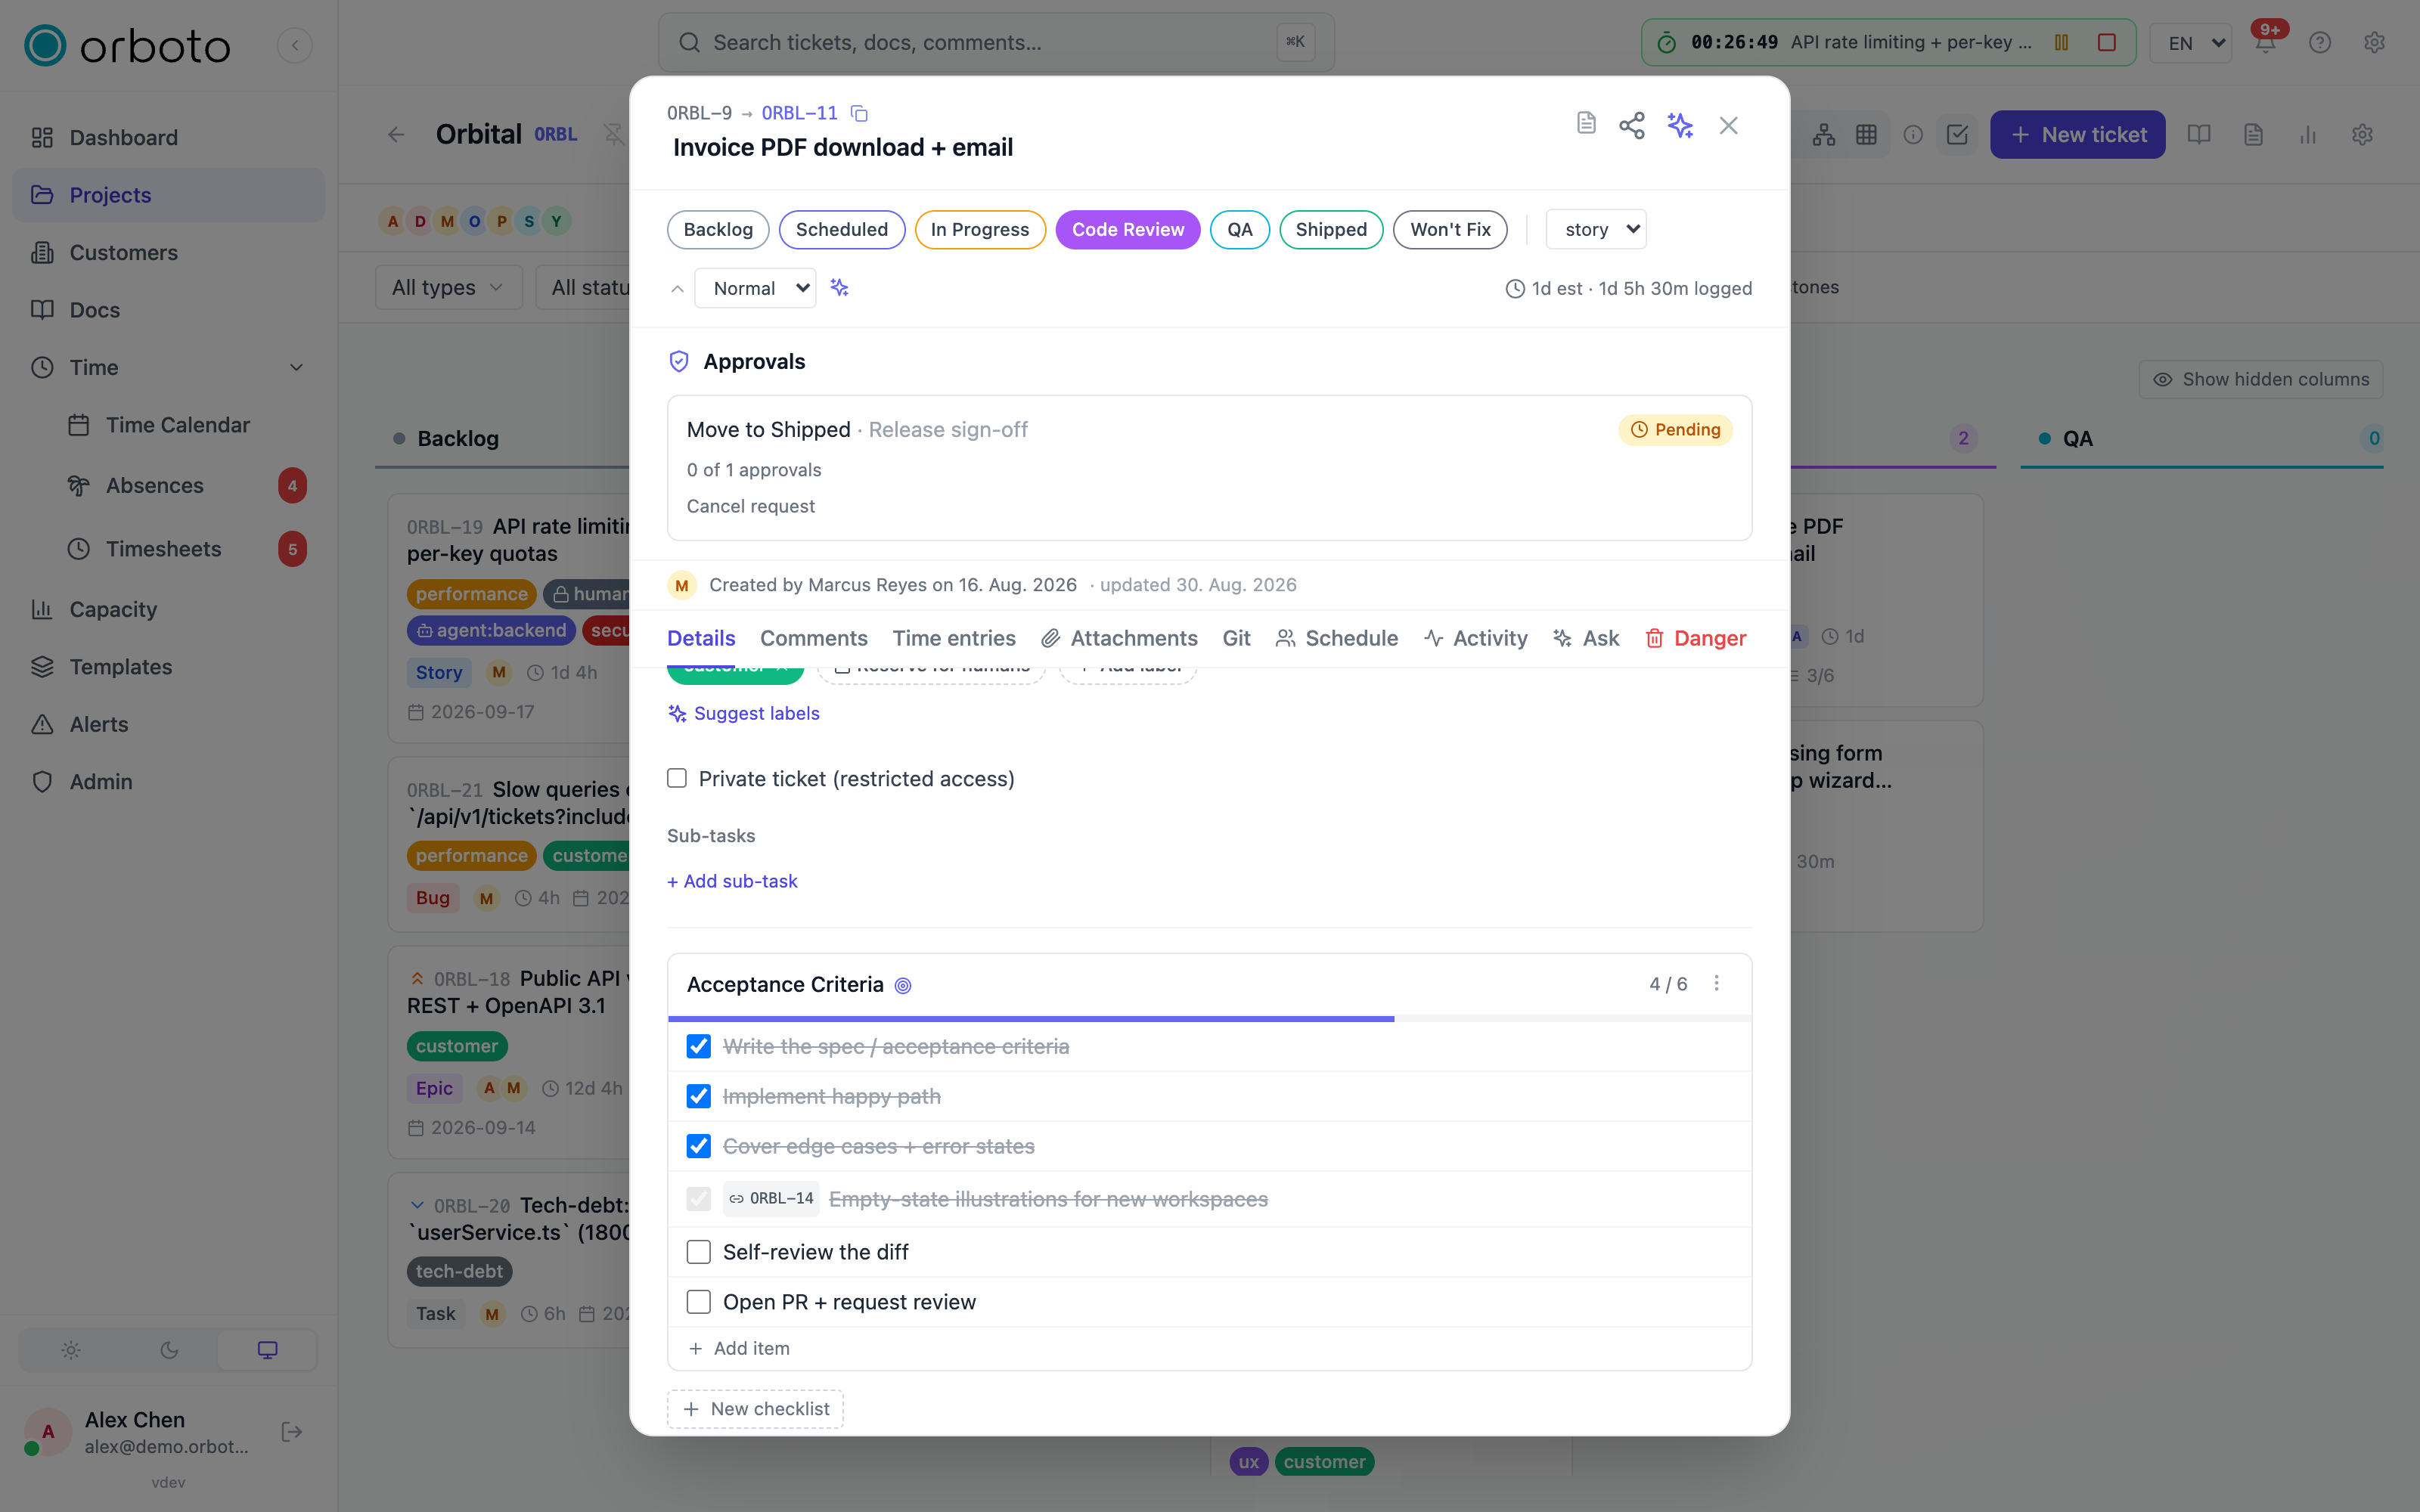
Break a ticket into smaller steps with a checklist. Add a new checklist, then add items and tick them off as you go.
- A checklist item can be linked to another ticket. When it is, the item ticks and un-ticks automatically as that linked ticket's status changes - handy for tracking sub-work.
- If a checklist grows into real work items, you can convert it into proper sub-tickets in one step.
Sub-tickets and parents
A ticket can have a parent and children. Use this to break an epic into smaller tickets, or to nest a task under a story. The ticket panel shows the parent link and lists any children.
Dependencies
Record that one ticket blocks or is blocked by another. Dependencies drive the Gantt links, the Network view, and blocked-ticket warnings on your dashboard.
Attachments
Attach files (images, documents, and so on) to a ticket. Attachments are stored securely and downloaded through the app - there are no public links.
Sharing a ticket
The address bar is a shareable link, too Added in v0.176.0: while a
ticket is open, the URL shows it (for example
.../projects/ACME?ticket=ACME-42), so copying the URL from the browser,
bookmarking it, or pasting it into chat always lands the reader on that
exact ticket. Your browser's Back button closes the ticket, Forward
reopens it.
The share menu on a ticket lets you:
- Copy the ticket key (for example
ACME-42). - Copy a link to the ticket.
- Copy as Markdown - a formatted snippet with the title, status, priority, assignees, and more, ready to paste into a document or chat.
- Email a summary of the ticket.
Activity and Git
- The Activity tab shows the ticket's history - what changed, when, and by whom.
- The Git tab shows linked commits and pull requests when your workspace connects a code repository (see Integrations). Mentioning a ticket key in a commit message links it here automatically.
AI actions on a ticket
If your workspace has AI features enabled, an AI menu on the ticket offers help such as:
- Summarize the ticket and its discussion.
- Suggest a better title, labels, or priority.
- Estimate how long the ticket will take, based on similar past tickets.
- Split a large ticket into suggested smaller ones.
- Ask a question about the ticket and get an answer grounded in its content.
Related and possible-duplicate tickets are also surfaced automatically while you work, so you do not open the same thing twice. The AI never changes anything without you confirming it. See AI assistant for the workspace-wide chat.
Bulk actions
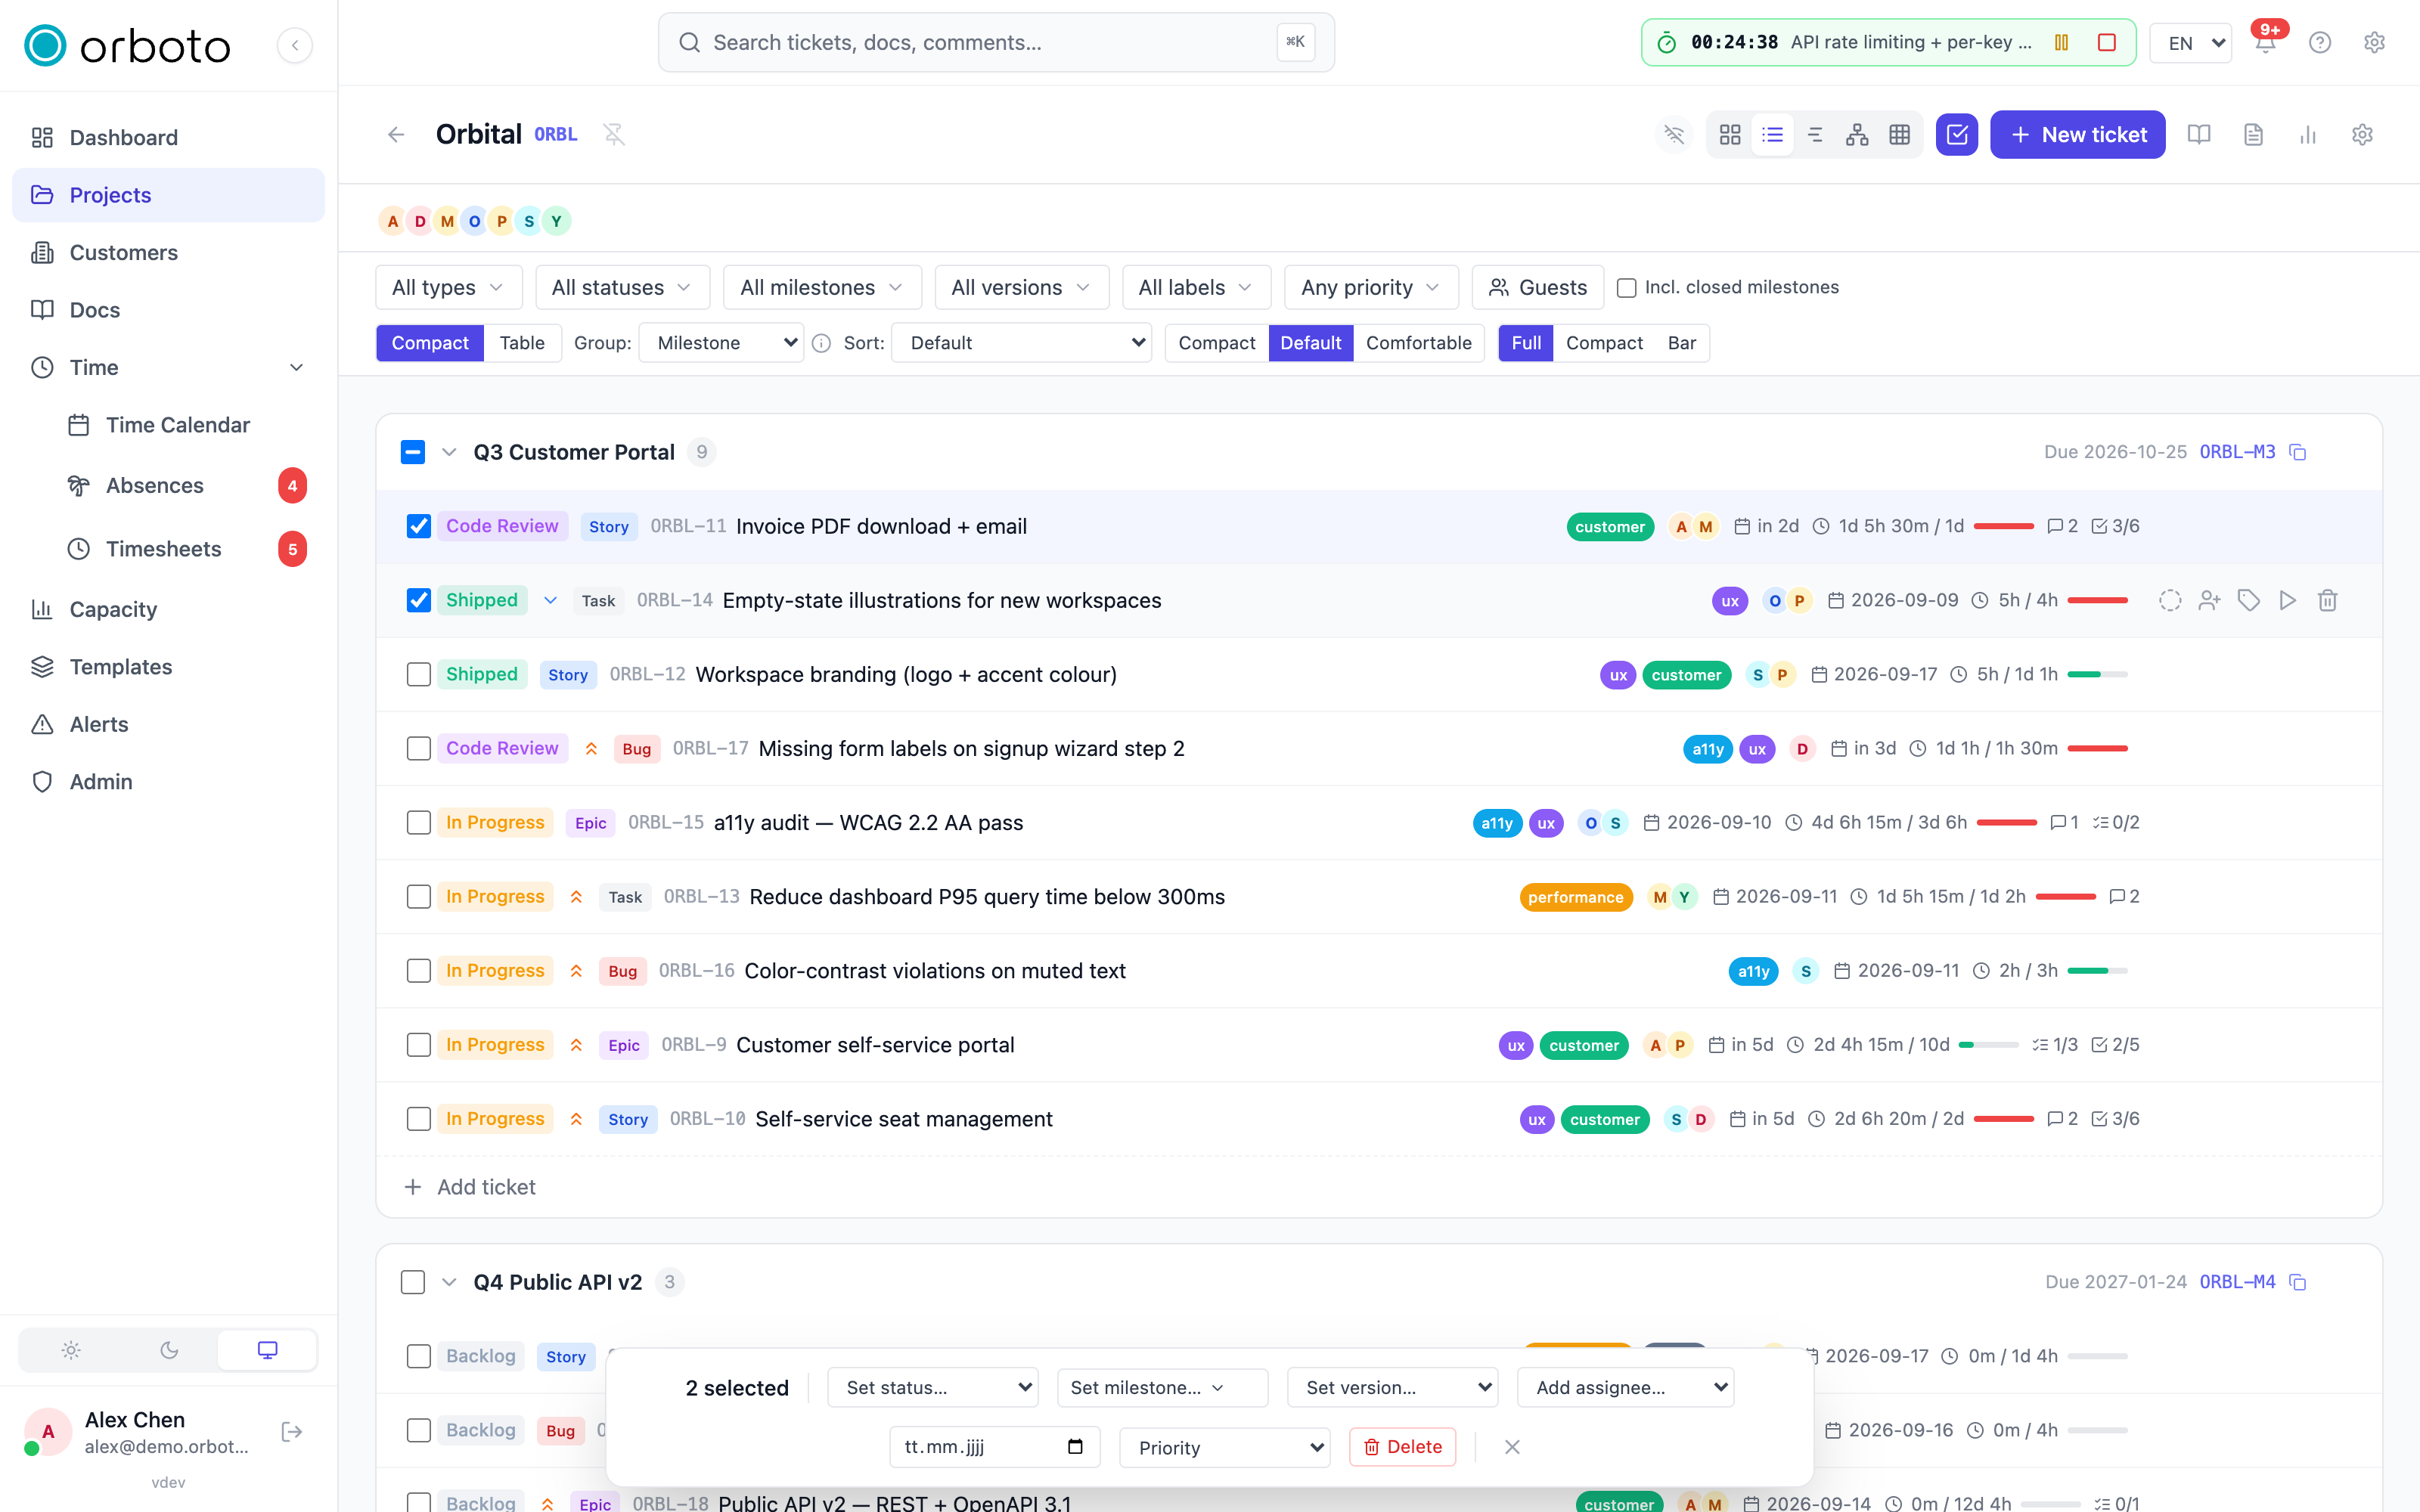
Need to change many tickets at once? Turn on select mode, tick the tickets you want, and use the bulk actions bar that appears:
- Set status, set priority, set milestone, set version, or set due date for all selected tickets.
- Add an assignee to all of them.
- Delete the selected tickets (with a confirmation).
Writing with the rich-text editor
Descriptions, comments, and doc pages all use the same editor. You can:
- Format text (bold, italic, headings, lists, quotes, code).
- Paste or drag in images.
- @mention teammates.
- Insert a smart link by typing
[[and picking a ticket, project, doc, or milestone - the link stays live and shows the current title. - Switch to raw Markdown with the toolbar toggle if you prefer to type the markup yourself.
Troubleshooting
I can't move a ticket to a status I know exists. Some workflows restrict which status transitions are allowed (for example, you can't skip straight from To Do to Done). Move it through the intermediate status, or ask a project admin if the workflow needs adjusting.
A checklist item keeps un-ticking itself. It's linked to another ticket and mirrors that ticket's status - close (or reopen) the linked ticket instead of toggling the checklist item directly.
I deleted several tickets by mistake with bulk actions. Bulk delete asks for confirmation but has no undo. Check with a project admin whether a recent backup can restore them; going forward, filter down to exactly the set you mean to change before selecting all.
The AI menu doesn't appear on a ticket. AI features are enabled per workspace by an administrator - if it's missing everywhere, ask whether AI is configured; if it's missing on one ticket only, it may be private and the AI actions may not have access.